Semi Truck Repair: A Practical Step-by-Step Guide
Learn a practical, safety-first approach to semi truck repair with step-by-step diagnostics, core systems explained, tools, and maintenance tips for owners and operators.

This guide shows how to diagnose, prioritize, and perform essential semi truck repairs with a safety-first, methodical approach. You’ll learn to map out repairs, gather the right tools, and follow a step-by-step workflow that covers major systems, common failure modes, and verification checks to bring a truck back to reliable operation.
Why Semi Truck Repair Matters
Semi truck repair is not just about fixing a malfunction; it’s about keeping a fleet safe, compliant, and productive. When a tractor or trailer system fails, it can create delays, jeopardize road safety, and increase maintenance costs. The Home Repair Guide team emphasizes that a proactive, disciplined repair routine helps owner-operators and fleet managers reduce breakdowns and extend vehicle life. In this section, we explore why repair matters, how it fits into daily operations, and how to approach repairs in a way that minimizes downtime while maximizing reliability. By understanding the role of regular maintenance in preventing failures, you’ll be better prepared to plan repairs, source parts, and schedule downtime efficiently. The core idea is simple: diagnose, repair, test, and document so you can sustain uptime and operator safety. This article uses neutral, practical guidance suitable for both independent drivers and fleet operations, with safety as the top priority. As you read, you’ll see how the concept of semi truck repair extends beyond patching a single issue to building a durable maintenance habit that supports the entire vehicle system. The guidance aligns with general safety and maintenance principles recommended by industry authorities and professional technicians. According to Home Repair Guide, a structured repair workflow reduces risk and makes complex tasks more manageable. The recommended mindset is methodical, not rushed, and always safety-first, especially around heavy equipment and high-pressure systems. The goal is to empower you with clear steps, practical tools, and a maintenance mindset that keeps big trucks on the road longer and safer.
Core Systems You Should Know
Understanding the major systems in a semi truck helps you diagnose problems faster and plan repairs more effectively. The engine, fuel system, cooling system, exhaust, and turbocharger are central to performance and reliability. The drivetrain, transmission, and differential determine how power is delivered to the wheels, while the air brake system is crucial for safety in commercial operation. Electrical and lighting systems enable visibility, fleet tracking, and diagnostic communication. Finally, chassis, suspension, and tires influence handling, ride quality, and load stability. This section provides a succinct overview of each domain and common failure modes you may encounter, such as fuel injector wear, cooling leaks, turbocharger surge, harness corrosion, and air brake leaks. Keep in mind that semi truck repair often requires a combination of mechanical inspection, diagnostic testing, and, when needed, part replacement. As you read, you’ll notice how each subsystem interacts with others: a coolant leak can mask an engine sensor fault, or electrical gremlins can trigger advisory alerts that mislead a technician. By recognizing these relationships, you’ll diagnose more accurately and avoid unnecessary parts replacement.
Diagnostic Approach and Planning
A disciplined diagnostic approach saves time and reduces repair costs. Start with a quick, safety-focused pre-check: secure the vehicle, set wheel chocks, disconnect nonessential power sources, and wear appropriate PPE. Develop a data-driven plan by reading fault codes with a heavy-duty diagnostic scanner, reviewing live data, and correlating symptoms with known failure modes. Create a checklist that covers critical areas: air system pressure and leaks, electrical circuits and fuses, fuel and coolant levels, hose and belt condition, and obvious mechanical wear. Document observations with photos or notes to support decisions and future troubleshooting. This section emphasizes a systematic approach rather than impulsive part swapping. Recognize that many failures are intermittent and may require repeated observation or staged repairs. When in doubt, consult service manuals and manufacturer guidelines to confirm torque specs, sealant types, and replacement intervals.
Safe, Effective Repair Practices
Repair work on semi trucks involves significant safety considerations. Always lockout/tagout procedures, relieve stored energy in high-pressure systems, and use jacks or lifts with sturdy stands. Choose the right tools for the job and verify compatibility with heavy-duty components. Accurate torque specs are essential for fasteners on wheels, drivetrain, and suspension parts; use a calibrated torque wrench and follow the manufacturer’s sequences. When replacing parts, source components from reputable suppliers and verify part numbers against service catalogs. Maintain cleanliness in the work area to prevent contamination of fuel, oil, and hydraulic lines. For electrical work, disconnect the battery before disconnecting wiring harnesses, and use a multimeter to verify circuit continuity and resistance. After any repair, recheck safety-critical systems (brakes, steering, and lights) in a controlled environment before returning the vehicle to service. This section reinforces the principle that safe, careful technique reduces the risk of injury and further damage, while producing reliable repair outcomes.
Preventive Maintenance for Longevity
Preventive maintenance is the backbone of reliable semi truck operation. A well-planned schedule covers regular inspections, lubrication, filter changes, and fluid top-offs according to manufacturer recommendations and operating conditions. Focus areas include engine oil and coolant, transmission and differential fluids, air filter and intake, fuel system cleaning, belt and hose health, tire condition and tread depth, and brake system maintenance. Monitor wear patterns on drums or discs, inspect the wheel bearings, and verify that lights and reflectors are functional. Document findings and schedule follow-up actions to close the loop on issues before they escalate. Proactive maintenance reduces unexpected downtime and supports safety, compliance, and performance. The approach aligns with industry guidance on best practices for heavy-duty vehicles and emphasizes staying ahead of wear through routine checks and timely part replacements. In short, a robust preventive maintenance plan is essential for controlling costs and keeping semi trucks dependable on the road.
Authority Sources and Learning Resources
For readers who want to deepen their knowledge, consult authoritative sources on heavy-duty vehicle maintenance and road safety. The Federal Motor Carrier Safety Administration (FMCSA) provides guidance on maintenance regulations and compliance for commercial vehicles. Safety best practices from OSHA address general workshop safety, hazardous energy control, and personal protective equipment. The National Highway Traffic Safety Administration (NHTSA) offers resources on vehicle safety features and repair-related recalls. These sources complement hands-on experience and manufacturer service data, helping you understand regulatory expectations and safe repair practices. By cross-referencing these sources with practical experience, you’ll build a stronger foundation for reliable semi truck repair and ongoing fleet maintenance.
Tools & Materials
- Screwdrivers (Phillips and flathead)(Insulated handles preferred; common sizes 3–8 mm tip)
- Combination wrenches & socket set (impact-rated)(Metric and SAE sizes; include 1/2)
- Breaker bar and torque wrench(Torque specs must be manufacturer-referenced)
- Heavy-duty diagnostic scanner compatible with heavy trucks(Read codes from ECMs and modules)
- Multimeter and test light(Check electrical circuits and continuity)
- Air pressure gauge and leak-detection solution(Inspect air brake lines for leaks)
- Jacks, stands, wheel chocks, and blocks(Use high-capacity stands for heavy axles)
- PPE kit (gloves, safety glasses, steel-toe boots)(Personal protective equipment is mandatory)
- Fluid caddy, funnels, and PPE-safe containers(For oil, coolant, and fuel handling)
- Replacement parts (OEM-specified where possible)(Verify part numbers before installation)
- Fuel and coolant compatible hoses and clamps(Only if failures are found)
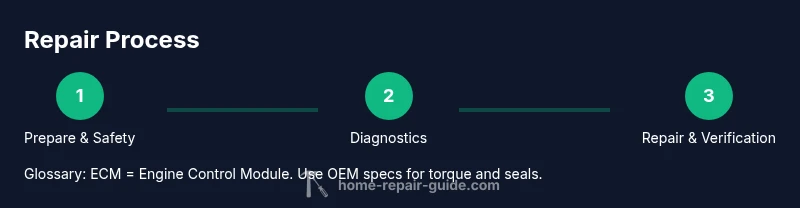
Steps
Estimated time: 2-6 hours
- 1
Prepare the work area and safety checks
Park on a level surface, engage parking brake, chock wheels, and disconnect nonessential power. Establish a safe work zone and gather all necessary PPE. Confirm you have a clear plan before touching critical systems.
Tip: Always start with a safety assessment and ensure the vehicle cannot move during work. - 2
Connect diagnostic tools and collect data
Attach the heavy-duty scanner, read fault codes, and monitor live sensor data. Note any codes and correlate with symptoms before disassembly. Save screenshots or logs for reference.
Tip: Use OEM diagnostic software when available for best accuracy. - 3
Inspect major systems visually and by feel
Check for leaks, cracks, wear, and loose connections in engine, fuel, cooling, air intake, and exhaust systems. Inspect the braking system and suspension components. Listen for unusual noises during static checks.
Tip: Take photos of wear patterns to guide parts selection. - 4
Test critical functions safely
Assess air brake system pressure with the engine off, then verify proper build-up and release. Check electrical circuits with a multimeter, verifying continuity and resistance across harnesses and fuses. Validate cooling system pressure and thermostat operation.
Tip: Never rely on a single observation; combine data points from multiple checks. - 5
Identify components for repair or replacement
Prioritize issues by safety impact and repair difficulty. Mark hoses, electrical connectors, and fasteners to ensure correct reassembly. Prepare replacement parts and lubricants according to OEM specs.
Tip: Label parts and use manufacturer diagrams to avoid misassembly. - 6
Perform the repair
Install replacement parts with correct torque, torque sequence, and sealing methods. Reassemble carefully, verify tightness, and clean up any spills. If you’re unsure, pause and consult a service manual.
Tip: Respect torque specs; overtightening can damage threads and seals. - 7
Verify repair and restore service
Reconnect power, start the engine, and perform a controlled test run in a safe area. Recheck all systems for leaks, abnormal noise, or warning codes. Document results and schedule follow-up maintenance.
Tip: Document test results and update the maintenance log immediately. - 8
Documentation and maintenance planning
Record the work performed, parts used, and observations. Schedule the next preventive maintenance tasks and set reminders for inspections or fluid changes based on operating conditions.
Tip: A well-maintained log reduces future downtime and supports compliance audits.
FAQ
What is included in semi truck repair?
Semi truck repair covers diagnosing and fixing issues across engine, fuel, braking, electrical, and air systems. It also includes preventive maintenance and component replacement when needed. A structured plan helps minimize downtime and ensure safety.
Semi truck repair includes diagnosing and fixing engine, braking, electrical, and air systems, plus preventive maintenance to keep the truck safe and on the road.
Do I need a professional for major repairs?
Major repairs involving structural components, high-pressure systems, or critical safety features often require professional technicians with specialized tooling and OEM service data. Basic diagnostics and preventive checks, however, can be started by a knowledgeable owner with proper training.
For major repairs, you should consult a certified technician. Basic diagnostic checks can be done by an informed owner with the right safety gear and tools.
What tools are essential for semi truck repair?
Essential tools include a heavy-duty diagnostic scanner, a torque wrench, a complete socket and wrench set, a multimeter, air pressure gauges, jacks and stands, and PPE. Having OEM-spec parts is also important for reliability and safety.
A good diagnostic scanner, torque wrench, and safety gear are essential, plus the right sockets and jacks for lifts and inspections.
How long does a typical preventive maintenance cycle take?
Preventive maintenance duration varies by truck condition and scope, but a routine multi-system check can take a few hours in a shop setting. Heavy repairs or part replacements will take longer and may require scheduling a downtime window.
Routine maintenance takes a few hours in a shop; bigger repairs may take longer and require scheduled downtime.
What safety practices should I follow during repairs?
Always use lockout/tagout, eye and hand protection, and suitable PPE. Work on stable surfaces with proper lifting equipment, and never bypass safety steps to save time.
Use lockout/tagout and proper PPE, and never skip safety steps even if you're in a hurry.
Where can I find reliable service data for a semi truck?
Refer to OEM service manuals, dealer portals, and established industry resources. Cross-check with authoritative safety and regulatory sites for compliance guidance.
Check OEM service manuals and trusted industry resources for accurate repair procedures and torque specifications.
Watch Video
Key Takeaways
- Prioritize safety first in all repairs
- Diagnose with data before replacing parts
- Keep a detailed maintenance log for future scheduling
- Understand core truck systems for better diagnostics
- Follow OEM specifications for torque and seals