Allison Transmission Repair: Step-by-Step Guide
A step-by-step guide to diagnosing, planning, and executing Allison transmission repair with safety, budgeting, and maintenance best practices for homeowners and fleets.

This guide helps vehicle owners and fleet managers navigate allison transmission repair with confidence. Learn to recognize common symptoms, perform safe diagnostics, and decide when a DIY approach is appropriate or when to hire a qualified technician. You’ll also get a practical repair-prep checklist and budgeting guidance to minimize downtime and protect your investment in heavy-duty transmission systems.
Why allison transmission repair matters
Allison transmissions power many heavy-duty applications, from commercial trucks to emergency vehicles. When these units fail or operate inconsistently, downtime can quickly cascade into missed pickups, delayed deliveries, or unsafe drivability. Reliable repair strategies help extend service life, protect engine performance, and maintain resale value. According to Home Repair Guide, adopting a proactive maintenance mindset reduces the likelihood of costly, urgent repairs and keeps fleets operating smoothly. In this article, we cover why restoration matters, common failure modes, and how to approach repairs in a practical, safety-conscious way. The term allison transmission repair refers to both the diagnosis and replacement of worn components, as well as limited repairs like valve body servicing or solenoid checks. While some issues can be diagnosed with basic tools, many repairs require specialized equipment and professional expertise to ensure performance and safety.
Common symptoms that signal repair work is needed
Recognizing early signs of trouble can prevent major failures. Look for slipping or delayed engagement between gears, rough or noisy shifting, or a harsh return to idle after gear changes. Transmission fluid that is dark, burnt-smelling, or contaminated with metal particles often points to internal wear or a leaking seal. Warning lights on the dashboard related to transmission or ECU systems should never be ignored; they warrant diagnostic testing. Other indicators include reduced power delivery, surging RPM without corresponding speed changes, and sudden fluid leaks beneath the vehicle. These symptoms don’t confirm a specific fix, but they indicate that a thorough inspection is warranted. For allison transmission repair, treating symptoms promptly reduces the risk of collateral damage to the torque converter or valve body and helps maintain drivability and fuel efficiency.
Diagnostic approach: DIY vs. professional decisions
A practical diagnostic strategy balances safety, cost, and reliability. Start with a visual inspection of wiring harnesses, connectors, and fluid lines. Check transmission fluid level and condition, and review any stored diagnostic trouble codes (DTCs) using a heavy-duty scanner compatible with Allison systems. If codes point to a solenoid, valve body, or sensor, you can perform non-invasive tests and replacements. However, many issues—especially those involving the torque converter, clutches, or hydraulic circuits—require specialized tools, precise torque specs, and sometimes a controlled teardown. Home Repair Guide analysis shows that attempting risky repairs without proper equipment can lead to misdiagnosis or safety hazards. When in doubt, consult a qualified technician who has experience with allison transmission repair and access to official service information.
Essential tools and safety prerequisites
Before diving into repair work, assemble a well-lit, clean workspace with stable lighting and ventilation. Have a hydraulic jack capable of supporting the vehicle’s weight, jack stands, and wheel chocks ready. A quality torque wrench, a full set of metric and SAE sockets, screwdrivers, pliers, and a drain pan are essential. You’ll also need tools for sealing and gasket work, a fluid extractor, and a code scanner compatible with Allison systems. Safety gear like gloves, eye protection, and protective clothing reduces the risk of exposure to hot fluids and moving parts. Always disconnect the battery during major disassembly, follow lockout/tagout procedures, and never rely on a jack alone to support a raised vehicle. These precautions protect you and preserve the integrity of the transmission during allison transmission repair.
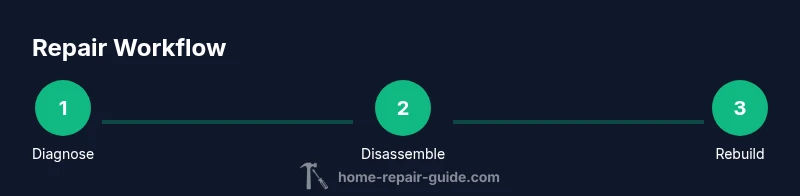
High-level repair workflow: what happens behind the scenes
A typical repair workflow begins with a confirmed diagnosis, followed by careful disassembly of the affected components. Technicians often drain and inspect fluids for contamination, measure clearances, and test the valve body and solenoids. If wear is detected, the next steps may include replacing worn clutches, updating seals, and resealing the housing. In some cases, a rebuilt assembly or exchange unit is used to minimize downtime. After reassembly, technicians refill with the correct Allison fluid and perform a thorough road test, checking shift quality, temperature, and line pressures. This sequence emphasizes accuracy and safety, since improper reassembly can cause catastrophic failures.
Maintenance to prevent future failures
Preventive maintenance reduces the likelihood of urgent repairs. Schedule regular fluid checks and changes with the manufacturer-recommended fluid type and viscosity. Keep cooling systems in good shape to avoid overheating, which accelerates transmission wear. Routine inspections of electrical connectors and harnesses help prevent intermittent sensor faults. For fleets, maintain a service log noting mileage, loads, and any abnormal symptoms, so you can spot trends earlier. Proactive maintenance not only extends life but also improves resale value and reduces downtime.
Choosing a shop and budgeting for allison transmission repair
Selecting the right shop is crucial. Look for technicians with documented experience servicing Allison transmissions and access to official service information. Request quotes that itemize labor, parts, fluid costs, and shop supplies, and ask for turnaround estimates. Compare warranties on rebuilt components and labor so you know who stands behind the work. In terms of budgeting, plan for potential variables such as diagnostic fees, fluid changes, and required replacements. Home Repair Guide analysis shows that informed buyers can negotiate better terms and prevent sticker shock. Keep a reserve for emergency trips or off-hours service in case of roadside failures, which can be more costly but necessary for uptime.
When to consider replacement vs repair and long-term care
Not all failures are recoverable with a rebuild. If the damage is extensive or if the cost of parts and labor exceeds a threshold relative to the vehicle’s value, replacement may be the wiser option. A rebuilt unit with a solid warranty can offer a favorable balance of cost and reliability, especially for high-mileage fleets. Regardless of choice, establish a long-term care plan that includes scheduled fluid changes, filter inspections, and periodic diagnostics. This approach reduces the chance of cascading issues and keeps the transmission operating within design specifications.
Tools & Materials
- Personal protective equipment (PPE)(Gloves, safety glasses, and steel-toed boots; use a long-sleeve shirt to protect arms)
- Hydraulic floor jack and jack stands(Stand supporting vehicle must be rated for weight and never rely on the jack alone)
- Torque wrench (1/2-inch drive preferred)(Calibrate and use torque specs from service literature)
- Full socket set (metric and SAE)(Includes Torx/Allen bits for transmission components)
- Drain pan and fluid extractor(Use a large-capacity pan; have absorbent rags for spills)
- Sealants, gaskets, and replacement seals(Only use manufacturer-approved kits)
- Allison transmission fluid (proper grade)(Check model-specific requirements; never mix fluids)
- Code scanner compatible with Allison systems(Identify DTCs related to solenoids and pressure sensors)
- Shop manual or official service information(Helpful for torque specs and service procedures)
- Cleaning supplies and rags(Keep surfaces free of debris during reassembly)
Steps
Estimated time: 6-9 hours
- 1
Prepare and secure the workspace
Park on a flat surface, engage parking brake, and chock wheels. Disconnect the battery if performing electrical tests, then gather all tools and safety gear in a central work zone.
Tip: Double-check that all power sources are isolated before any fluid work to avoid shocks or shorts. - 2
Lift vehicle and access transmission area
Use a hydraulic jack to raise the vehicle and place jack stands on solid points. Ensure the vehicle is stable before removing any panels or pans.
Tip: Never rely on the jack alone; always use jack stands and wheel chocks for stability. - 3
Drain transmission fluid safely
Place a drain pan beneath the transmission, remove the drain plug, and capture old fluid. Replace the plug after draining and prepare fresh fluid for refill.
Tip: Work with the engine cool and wear gloves; old fluid may be hot and caustic. - 4
Disconnect/inspect hydraulic lines and valve body
Carefully detach external lines and inspect the valve body. Look for signs of wear, contamination, or varnish buildup that could indicate internal issues.
Tip: Label hoses to ensure correct reassembly and prevent misrouting of lines. - 5
Replace worn components
Replace seals, gaskets, and any worn clutches or solenoids as per service literature. Clean mating surfaces and verify component fit before reassembly.
Tip: Always use manufacturer-approved parts and verify part numbers match your model. - 6
Reassemble and refill
Reassemble components in the correct order, apply new seals, and refill with the recommended hydraulic fluid to proper level. Check for leaks as you go.
Tip: Use the correct fill procedure and ensure the system is fully bled to avoid air pockets. - 7
Perform initial diagnostic checks
Reconnect battery, clear codes, and run a diagnostics sweep to confirm no new faults. Verify line pressures and actuator operation if equipment allows.
Tip: Document any codes and cross-check with the service bulletin for related fixes. - 8
Road test and final inspection
Take a cautious test drive; shift through all gears, monitor temperature, and listen for abnormal sounds. Complete a final visual inspection for leaks and secure hardware.
Tip: If anything feels off during the test, stop and re-check seals, lines, and mounting hardware.
FAQ
What are the most common signs that an Allison transmission needs repair?
Common signs include slipping gears, harsh or delayed shifts, unusual noises, and warning lights. Fluid condition and color can also indicate internal wear or contamination. If you observe these indicators, perform diagnostics or seek professional help quickly to prevent further damage.
Common signs include slipping gears, rough shifting, and warning lights. Check the fluid and seek professional help if you notice any of these indicators.
Can I perform Allison transmission repair myself at home?
Some basic diagnostics can be done at home, but many repairs require specialized tools and service literature. For critical components like the valve body or torque converter, it’s safest to hire a qualified technician.
You can do basic checks, but major repairs usually need a professional.
How do I decide between repairing vs replacing the transmission?
If repair costs approach or exceed the used value of the vehicle or involve extensive internal damage, replacement may be more economical. Consider warranty, downtime, and long-term reliability when deciding.
If repairs cost too much or the unit is very worn, replacement may be better.
What should I expect to pay for Allison transmission repair?
Costs vary by model, damage extent, and labor rates. Obtain quotes that break out parts, labor, and fluids, and ask about warranties on rebuilt components.
Costs vary; get a detailed quote and check warranties.
What maintenance helps extend transmission life?
Regular fluid changes with the correct specification, clean cooling systems, and periodic diagnostics help extend life. Address leaks promptly and keep electrical connections clean and tight.
Keep up with fluid changes and fix leaks quickly.
Is there a difference between rebuilt vs new transmissions?
Rebuilt units are common and cost-effective with warranties, but may have variable longevity. New transmissions offer maximum reliability but at a higher upfront cost.
Rebuilt units are practical but check the warranty; new units cost more.
Watch Video
Key Takeaways
- Identify symptoms early to avoid major failures
- Balance DIY testing with professional repair where needed
- Use proper tools and safety measures at all times
- Plan ahead for parts, time, and cost