Why Is Automatic Repair Not Working? A Practical Troubleshooting Guide
Urgent, step-by-step guide to diagnose why automatic repair isn't working, with practical fixes, safety tips, and when to call a professional.

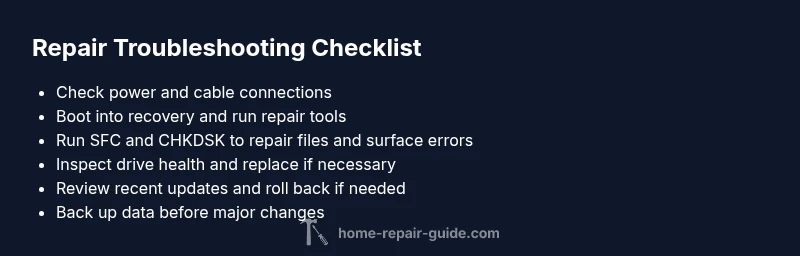
If you're asking why is automatic repair not working on startup, the most likely culprit is corrupted boot configuration or damaged system files. Start with quick checks: boot to recovery, run automatic repair, then run system file checker (SFC) and CHKDSK, and verify disk health before attempting a clean reinstall.
Why Automatic Repair Fails
Automatic repair is designed to automatically examine and attempt to fix boot and system integrity problems. When it fails, you’ll usually see an error message, a loopback restart, or a screen that says the repair couldn’t complete. If you’re facing this issue, you’re not alone. The root cause is often a combination of corrupted boot configuration, damaged system files, or a failing storage device. In the Home Repair Guide analysis, the phrase why is automatic repair not working often points to corrupted critical files or a disk health issue rather than a simple glitch. The good news is that most failures are solvable with a structured approach that starts with the simplest checks and progresses toward more involved repairs. By following the steps in this guide, you’ll isolate the problem, apply safe fixes, and reduce the risk of data loss.
Common Causes at a Glance
- Corrupted boot configuration or missing boot files: The repair tool can’t locate the system startup files.
- Damaged or missing system files: Essential OS files become unreadable.
- Disk errors or a failing drive: Bad sectors or a failing HDD/SSD prevent repair from completing.
- Outdated BIOS/UEFI or incompatible firmware: The repair module can’t communicate properly with hardware.
- Malware or security software interference: Protective software blocks repair operations.
- Recent updates or driver changes: A new update introduces conflict with the repair routine.
Diagnostic Approach: How to Identify the Real Cause
Start with the simplest checks and work toward the more complex ones. Confirm power stability and cable connections, then attempt to boot into recovery mode. Look for any error codes, and note whether the failure happens before the OS loads or during the repair scan. Run basic hardware diagnostics if possible (memory test, storage health check). Resetting to a previous restore point can help isolate whether a recent change caused the failure. If the problem persists after basic checks, escalate to tool-specific repairs (boot record repair, file system checks) and consider a clean reinstall as a last resort. Throughout, keep updates and backups current to prevent data loss.
Quick Fixes You Can Try Right Now
- Reboot into the recovery environment and run automatic repair again.
- Run a system file check (SFC) and disk check (CHKDSK) to repair corrupted files and surface errors.
- Ensure the drive is connected correctly and has no loose cables.
- Update firmware/BIOS and disable conflicting security software temporarily while repairs run.
- If you have a restore point from before the failure, try restoring the system to that point.
- If possible, try repairing on a separate drive or perform a clean installation only after data is backed up.
Deep Dive: Fixes for the Most Common Causes
If corrupted boot configuration is the issue, use recovery tools to repair the boot records and rebuild the startup configuration. If disk health is the bottleneck, run comprehensive surface checks and consider replacing the drive if errors persist. For malware, run a trusted antivirus scan and perform a safe mode cleanup. When updates or drivers cause the problem, consider rolling back the latest update or driver and retrying the repair. In stubborn cases, a clean reinstall with fresh OS installation and a data backup plan is the safest route. Always verify data integrity after fixes.
Safety, Warnings, and When to Call a Pro
- Back up your data before executing major repairs; automatic repair tools can fail and reveal corrupted files.
- Do not open power supplies or attempt hardware repairs unless you’re trained; there is a risk of shock or fire.
- If you hear buzzing, grinding, or see overheating, stop immediately and call a professional.
- If you’re not comfortable with boot configuration, disk health checks, or system restores, seek professional help to avoid data loss.
- After any repair attempt, run a full backup and validate the system by performing a test reboot.
How to Prevent Future Failures
- Schedule regular disk checks and maintenance: run CHKDSK and SFC periodically.
- Keep backups up to date and verify restore points before applying major updates.
- Maintain software hygiene: only install trusted updates and drivers from official sources.
- Monitor hardware health: run memory tests and monitor temperatures and power supply stability.
- Create a recovery plan: know how to access safe mode, recovery drive, or system restore options.
Steps
Estimated time: 60-120 minutes
- 1
Back up data before proceeding
Before making repairs, ensure you have a current backup of important files. This reduces the risk of data loss if the repair process reveals further issues.
Tip: Use both cloud and local backups if possible. - 2
Access recovery options
Restart the device and boot into the recovery or advanced startup options. Choose the repair or troubleshoot option to access automatic repair tools.
Tip: If you can’t boot, use a recovery USB/DVD to access the same tools. - 3
Run automatic repair and system checks
From the recovery menu, initiate automatic repair. If it completes unsuccessfully, run a System File Check (SFC) and CHKDSK to repair corrupted files and surface disk errors.
Tip: Note any error codes displayed; they guide the deeper fixes. - 4
Inspect hardware connections
Power down, disconnect from power, and inspect internal cables, especially storage drives and memory modules. Reseat components carefully.
Tip: Avoid touching motherboard traces and static-sensitive parts without grounding. - 5
Assess boot configuration and firmware
If the repair cannot find boot files, use recovery tools to repair boot records or rebuild the startup configuration. Check for BIOS/UEFI updates if applicable.
Tip: Follow official vendor guidance for firmware updates to avoid bricking the device. - 6
Consider restore points or clean install as last resort
If the issue persists, restore the system to a point before the failure or perform a clean OS installation after data backup.
Tip: A clean install resets system state but requires data recovery plans. - 7
Verify repair and monitor
After applying fixes, reboot and verify that automatic repair can run or complete successfully. Run routine maintenance to ensure long-term reliability.
Tip: Keep a log of fixes and test results for future reference.
Diagnosis: Automatic repair stalls or reports an error during boot/ startup
Possible Causes
- highPower issue or unstable hardware connections
- highCorrupted boot configuration or missing boot files
- highDisk errors or failing drive
- mediumOutdated BIOS/UEFI or firmware conflicts
- mediumMalware interference or security software blocks repairs
Fixes
- easyCheck power supply and all internal/external cables; reseat RAM if applicable
- easyEnter recovery, run automatic repair, and attempt SFC and CHKDSK
- mediumRun disk health diagnostics and consider replacing a failing drive
- mediumUpdate BIOS/UEFI and disable conflicting security tools temporarily
- hardRestore from a previous restore point or perform a clean install if needed
FAQ
What does automatic repair actually do, and why might it fail?
Automatic repair scans for boot and system integrity issues, then attempts to fix them. It can fail due to corrupted boot files, damaged system files, or disk errors, among other causes.
Automatic repair scans for boot and system problems and tries to fix them; failures usually come from corrupted files or disk issues.
Why does automatic repair fail after a software update?
Sometimes updates alter critical files or drivers, creating conflicts with the repair process. Rolling back the update or repairing the installed components can help.
Updates can clash with repair; rollback can restore compatibility.
Can I run automatic repair from a USB drive or installation media?
Yes. You can boot from installation media and access repair tools; this often provides more robust options than built-in repair.
Yes, use USB or installation media to access repair tools.
Is my data safe during automatic repair attempts?
Repair tools aim to preserve data, but there is always some risk. Backing up before repairs is strongly advised.
There's always some risk; back up first to be safe.
When should I seek professional help?
If you hear unusual noises, experience hardware failures, or repeated repair failures despite multiple attempts, contact a professional.
If hardware sounds off or fixes fail repeatedly, get a pro.
Watch Video
Key Takeaways
- Start with simple recovery checks
- Corrupted files and disk health are common culprits
- Back up before major repairs and verify afterward
- If unsure, escalate to professional help
- Prevention saves future downtime