What You Need to Repair Willy's Boat: A Step-by-Step Guide
Discover what you need to repair Willy's boat with a practical, step-by-step checklist. This Home Repair Guide tutorial covers essential materials, tools, safety, and testing to help homeowners complete a seaworthy repair.

To fix Willy's boat, you first confirm what you need to repair Willy's boat: a prepared checklist, marine-grade epoxy, fiberglass cloth, patching compounds, fasteners, caulk, and the right hand tools. This guide walks you through a step-by-step plan to inspect damage, select materials, prep surfaces, apply repair patches, seal seams, and test water tightness. According to Home Repair Guide, careful preparation reduces failures and extends boat life.
what do you need to repair willy's boat: essential checklist
If you’re planning a repair on Willy’s boat, the first question is simple yet crucial: what do you need to repair willy's boat? A robust checklist helps you stay organized and avoid mid-project trips to the hardware store. Begin with safety, workspace, and materials. Safety gear includes gloves, goggles, and a respirator for sanding and epoxy work. Set up your work area in a well-ventilated space with drop cloths to protect water and surfaces. Pre-read manufacturer instructions for any epoxy, sealant, or patching compound you’ll use, and note curing times. Planning ahead also reduces waste and mistakes. According to Home Repair Guide, preparation matters as much as the repair itself, so take time to map out every step before you touch the hull.
Quick material checklist
- Safety gear (gloves, goggles, respirator)
- Marine-grade epoxy resin and hardener
- Fiberglass cloth (6–12 oz)
- Marine patching putty or filler
- Marine plywood or solid backing patches
- Marine sealant or caulk
- Stainless steel deck screws
- Sandpaper and sanding block
- Mixing cups and stir sticks
- Putty knives and spreaders
- Tape, drop cloths, and masking supplies
- Cleaning solvent (isopropyl alcohol or acetone)
- PPE: respirator, gloves, eye protection
Intended outcome: a clean, dry hull surface ready for bonding, sealing, and finishing. The materials above form the backbone of most small- to mid-diameter hull repairs, whether the work is cosmetic or structural.
Understanding boat repair basics
Boat repair blends carpentry, fiberglass work, and marine sealing. The goal is to restore structural integrity and waterproofing without compromising buoyancy or safety. Start by assessing the hull’s core condition; soft spots may indicate rot or delamination. Use a dull punch or probe to test for softness, and measure how deep any damage runs. Always work with marine-grade products designed for constant moisture exposure. This section introduces common repair methods, including patching holes with epoxy-fiberglass composites and replacing compromised planks or skins when needed. Remember that small, well-executed repairs often outperform large, sloppy fixes in the long term. For best results, keep surface moisture-free during bonding and follow curing times precisely.
Brand note: Home Repair Guide emphasizes using the right materials and clean, dry surfaces to maximize bond strength and durability. These principles align with standard marine repair practices and help ensure the repair lasts across seasons.
Materials and tools overview
A successful repair hinges on selecting the correct materials and having reliable tools on hand. Marine-grade epoxy, resin hardener, and fiberglass cloth are the core trio for structural repairs, while patching compounds and backing patches provide strength where the hull is compromised. Tools like mixing cups, spreaders, and sanding blocks ensure you apply materials evenly and achieve a smooth transition to the surrounding hull. Surface prep—clean, dry, and lightly abraded—maximizes adhesion. In this section, we outline how each material contributes to the repair and where it fits in the workflow. Remember to keep all materials compatible with marine environments and follow the manufacturer’s mixing ratios for epoxy systems.
Safety first: PPE and workspace setup
Working on a boat involves solvents, fiberglass dust, and epoxy resins that can irritate skin, eyes, and lungs. The first rule is to use proper PPE: nitrile gloves, safety goggles, and a respirator with organic vapor cartridges when sanding or mixing epoxy. Ensure your workspace has good ventilation and a stable, level surface. Protect nearby water and surfaces with drop cloths and tape off the area to prevent debris from entering the water. Keep fire safety in mind: epoxy resins are flammable before curing, so avoid open flames and heat sources nearby. A dedicated, ventilated area reduces risk and improves the quality of your bond.
Inspecting the damage: where to look
Begin with a thorough exterior and interior inspection of Willy’s boat. Look for cracks, punctures, delamination, soft spots, and water staining that indicate moisture intrusion. Check the hull-to-deck joint, keel area, and transom for signs of stress. Inside the hull, inspect stringers and frames for rot; if you find soft wood or spongy areas, plan to replace or back up the affected sections. Use a moisture meter if available to quantify moisture content, and document every area with photos and measurements. This documentation helps you choose patch sizes, materials, and bonding methods, and it serves as a reference for future maintenance.
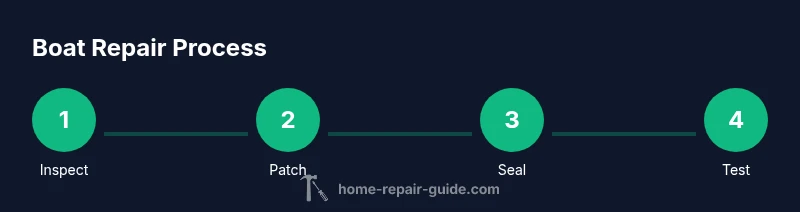
Step-by-step repair plan overview
A clear plan keeps a repair project on track and reduces rework. Start with a surface prep phase, then progress to patching and reinforcement, followed by sealing and finishing. Always work in small, controlled stages to maintain bond strength and minimize dust and waste. The plan below is a practical scaffold that can be adapted to different hull materials and damage scales. By following a structured plan, you minimize guesswork and ensure a durable result that keeps Willy’s boat seaworthy across seasons.
Surface prep and patching techniques
Surface preparation is the secret to a successful bond. Begin by removing loose resin and fibers around the damaged area, being careful not to widen the crack. Clean the area with solvent and let it dry completely. Lightly abrade the surface to create a mechanical key for the epoxy. Mix resin and hardener according to the manufacturer’s directions, then apply a liberal coat to the patch area. Place the fiberglass cloth or backing patch over the resin and saturate with additional resin to remove air voids. Overlap patches by at least 2 inches for continuity and strength. Allow curing per the product’s times; do not rush.
Sealing, fairing, and finishing
After the resin has cured, seal seams with a marine-grade caulk or sealant; this prevents water ingress and helps maintain flexibility in the joint. Once sealed, grind or sand the area flush with the surrounding hull, paying attention to fairing both the patch edge and the hull curvature. For a clean look and extra protection, apply a compatible marine primer and, if desired, paint or anti-fouling coating. Always follow drying times between coats and inspect the finish for pinholes or rough spots. A careful finish not only looks better but helps protect the repair from future exposure to sun and salt.
Testing and maintenance tips
Before putting Willy’s boat back in the water, perform a water-tightness test. Fill a bucket and slowly pour water around the repaired area while observing for leaks from the inside or outside. Check for any soft spots after a suggested cure period and re-check the surface for cracks or delamination after the first run in light use. Schedule periodic inspections every season, paying particular attention to high-stress areas like the transom, keel, and gunwales. A simple maintenance routine extends repair life and reduces the chance of sudden failures during a trip.
AUTHORITY SOURCES
For safety and best practices, refer to these authoritative resources:
- https://www.uscg.mil - U.S. Coast Guard safety and hull integrity guidelines
- https://www.noaa.gov - Marine environment and weather considerations that impact maintenance
- https://www.osha.gov - Workplace safety standards and PPE recommendations
These sources reinforce the importance of proper planning, safe working conditions, and marine-grade materials when repairing a boat. Home Repair Guide uses these standards to inform our guidance and recommendations for homeowner repairs.
Tools & Materials
- Marine-grade epoxy resin(Mix with hardener in exact ratio per manufacturer.)
- Epoxy hardener(Use compatible hardener for resin system.)
- Fiberglass cloth (6–12 oz)(Cut patches slightly larger than damage.)
- Marine patching putty or filler(For smoothing small irregularities.)
- Marine plywood or solid backing patches(Back patches for structural repair.)
- Stainless steel deck screws(Corrosion-resistant fasteners for backing patches.)
- Marine sealant or caulk(Seal seams after patching.)
- Sandpaper (80-120 grit) and sanding block(Prepare and finish bonded surfaces.)
- Mixing cups and stir sticks(Accurate resin-to-hardener ratios.)
- Putty knives and spreaders(Apply fillers and sealants smoothly.)
- Masking tape, plastic sheeting(Contain dust and protect water surface.)
- Nitrile gloves, safety goggles, respirator(Protect skin and lungs during work.)
- Solvent for cleanup (isopropyl alcohol or acetone)(Clean surfaces before bonding.)
Steps
Estimated time: 6-8 hours total (plus curing time as specified by materials)
- 1
Inspect the hull
Conduct a thorough visual and tactile inspection of the hull, looking for cracks, soft spots, and delaminated layers. Mark all damaged areas with chalk or tape to guide patch size and shape. Document findings with photos for reference during the repair.
Tip: Use good lighting and a checklist to ensure you don’t miss hidden damage. - 2
Document damage and measure
Record dimensions of each damaged area and note depth of any cracks. Photos and measurements help you choose backing patches and patch size, and they simplify ordering materials if you need replacements.
Tip: Take overhead shots to capture the hull’s curvature for patch shaping. - 3
Prepare workspace and materials
Set up a ventilated, dry workspace. Lay down drop cloths to protect water and floors. Gather all required materials and tools before you start to avoid interruptions that could compromise bonding.
Tip: Label containers and organize patches by size for efficiency. - 4
Remove damaged material
Carefully remove loose wood or damaged fiberglass around each defect. Do not over-cut; aim to expose solid, sound material for patches. Clean the exposed area with solvent and let it dry completely.
Tip: Work slowly to preserve surrounding structure; damaged edges should be clean and square. - 5
Apply resin and back patches
Mix epoxy resin and hardener per instructions. Coat the damaged area and place backing patches as needed. Apply patches with enough resin to saturate the cloth and eliminate air pockets.
Tip: Work in small sections to maintain adhesive strength and avoid air bubbles. - 6
Lay fiberglass and saturate
Place fiberglass cloth over the patch and saturate with additional resin. Smooth from the center outward to blend edges with the surrounding hull. Feather edges to avoid ridges.
Tip: Overlap cloth by at least 2 inches beyond damaged zones for strength. - 7
Seal seams and fair edges
Apply marine sealant along the patch seams. Allow sealant to cure, then sand edges flush with the hull for a smooth transition. Inspect for voids and reapply if necessary.
Tip: Don’t over-sand; preserve the patch’s structural layer beneath the surface. - 8
Finish and protect
Optionally apply primer and antifouling coating suited to your boat type. A proper finish reduces UV damage and improves durability of the repair. Clean up tools and store materials properly.
Tip: Select finishes compatible with your hull material and water exposure. - 9
Cure, test, and monitor
Allow epoxy to cure fully (often 24 hours for initial cure, longer for full strength). Re-check moisture and bond strength, then perform a water test before returning to service. Schedule follow-up inspections after the first voyage.
Tip: Always verify cure times in the product datasheet and avoid putting the boat back in service early.
FAQ
What is the first step to repair Willy's boat?
Begin with a thorough hull inspection and documentation of all damage. This helps you size patches correctly and plan material needs. Developing a clear plan reduces rework.
Start with a careful hull check and document the damage; it guides patch sizing and material choice.
Should I replace damaged wood or patch it?
Small or localized damage can usually be patched with epoxy and fiberglass. Larger or rot-damaged sections may require removing compromised material and installing backing patches or new planking.
Patch small areas when possible, but replace rotten sections to restore structural integrity.
What tools are essential for hull repairs?
Key tools include epoxy resin and hardener, fiberglass cloth, backing patches, a mixing set, sanding supplies, and a caulking gun for seals. PPE is essential for safety.
You’ll need epoxy, fiberglass, patches, mixing tools, sanding gear, and safety gear.
How long does epoxy cure and when can I test?
Epoxy typically cures within 24 hours for initial strength, but full cure may take longer depending on temperature and humidity. Check the datasheet for exact times before testing the repair.
Most epoxies take about a day to set; full strength depends on conditions, so check the product guide.
Is it safe to perform boat repairs in a regular garage?
Yes, if you have proper ventilation, dust control, and fire safety measures. Use PPE, keep flammables away, and store epoxy according to the label.
You can repair in a well-ventilated garage with PPE and proper storage.
Watch Video
Key Takeaways
- Plan before you cut and patch
- Use marine-grade materials for durability
- Follow epoxy cure times precisely
- Seal seams to prevent water ingress
- Test water tightness before returning to service