Screen Door Repair: A Practical DIY Guide
Learn how to diagnose and fix common screen door problems—frame misalignment, torn screens, and weatherstripping—with a clear, step-by-step approach, essential tools, safety tips, and maintenance advice for homeowners and renters.

Goal: Repair a screen door's frame, screen, and hardware so it operates smoothly and keeps insects out. In 5 steps, diagnose loose hardware, misaligned latch, torn screening, warp in the frame, and worn weatherstripping. This guide covers common fixes, tool lists, safety tips, and when to replace parts. According to Home Repair Guide, many issues stem from simple, user-friendly fixes. Follow these steps to save time and avoid costly repairs.
Common Causes of Screen Door Problems
Over time, screen doors reveal wear from daily use, weather exposure, and inconsistent maintenance. Understanding the usual culprits helps you pick the simplest, most effective fix first. In most homes, screen door repair is not about replacing an entire door, but about restoring alignment, sealing gaps, repairing the screen, and refreshing worn hardware. The four most common categories are frame alignment, hardware wear, screen damage, and weather-stripping. Misalignment is often the result of loose or stripped hinge screws, a slightly bowed frame, or uneven weight when the door is opened. Hardware wear includes hinges, latches, and handles that have become loose or bent, causing binding or mis-seating of the latch. Screen damage ranges from punctures and sagging corners to tears that compromise airflow and allow pests. Finally, weather-stripping wears down with sun and temperature changes, letting drafts and moisture into the doorway. The good news: most issues are repairable with standard hand tools and affordable replacement parts. When you start, test the door by opening and closing slowly, listening for rubbing sounds and feeling for binding at specific points along the hinge line and latch. This quick diagnostic sets you up for targeted fixes rather than unnecessary replacements.
According to Home Repair Guide, addressing these root causes promptly can extend the life of your screen door and improve energy efficiency in your entryway.
Assessing the Door: Visual Inspection and Measurements
A careful assessment is the backbone of a successful screen door repair. Begin with a visual sweep: look for obvious warping, loose screws, bent hinges, torn mesh, and gaps along the door frame. Check the door alignment in the jamb by holding the door closed and tracing the gap at the top, middle, and bottom edges. Use a tape measure to confirm hinge placement and ensure that the strike plate aligns with the latch. A simple test can reveal misalignment: close the door slowly and observe where it rubs or sticks; this indicates where to adjust. For the screen, inspect for punctures, sagging corners, or loose spline. Remove the spline with a flat tool only to the point you can replace it without stressing the frame. Record all measurements and note which components require replacement before purchasing parts. If the frame feels soft or water-damaged, document the area for potential deeper repairs.
During inspection, confirm weatherstripping integrity: a torn or compressed gasket around the door can undermine insulation. If weatherstripping appears worn, measure its length and thickness to select the right replacement. Finally, test the door’s operation with the screen in place and with the door open, to compare how the screen and frame move together. Thorough assessment prevents misdiagnosis and helps you budget accurately for parts and time. Based on Home Repair Guide analysis, most homeowners can complete a comprehensive inspection in 20–40 minutes.
Repair Options: DIY Fixes vs Professional Help
Screen door repair can usually be handled with basic DIY skills, especially when issues involve tightening hardware, realigning hinges, or patching the screen. Simple fixes, like adjusting the hinge screws or repositioning the strike plate, are often within reach for homeowners and renters with common tools. When choosing a DIY path, start with the least invasive solution: tighten screws, lubricate the hinge pivots with a clean, light oil, and re-check the door’s alignment. For damaged screens or worn weatherstripping, replacements are straightforward for most standard doors. If the frame is bowed, warped, or significantly rotten, or if hinges are worn to the point of loose mounting, professional help may be more cost-effective in the long run—attempting major frame repair without proper experience can lead to misalignment and further damage. In scenarios involving metal doors with rust, or wooden frames with cracked joints, a pro can assess structural integrity and determine whether reinforcement is required. When in doubt, document the condition, compare repair costs to a replacement option, and seek a second opinion if the frame shows signs of structural weakness. This balanced approach aligns with Home Repair Guide’s guidance to start small and escalate only when necessary.
Step-by-Step Repair Scenarios (Overview)
Below is an organized overview of typical repair scenarios you’ll encounter when addressing screen door issues. Each scenario focuses on a common problem and outlines a pragmatic approach to fix it, including tools and parts you’ll likely need. This section is designed to complement the detailed Step-By-Step instructions later and helps you decide whether a DIY solution is appropriate for your door’s design and condition. In all cases, prioritize safety: wear eye protection when cutting or sanding, and unplug power tools when not in use. If you encounter unfamiliar fasteners, replace them with similar-sized hardware or consult a hardware store expert before proceeding. Remember: accurate measurements are critical for proper reassembly and long-term performance. By following a methodical process, you’ll minimize guesswork and maximize the chances of a durable repair.
Maintenance Tips to Extend Life
Consistency is the best defense against recurring screen door problems. Regular maintenance reduces wear, preserves energy efficiency, and keeps insects out. Start by performing a quick monthly check: ensure hinges are tight, the door sits evenly in the frame, and the latch engages smoothly. Clean the track and weatherstripping to remove dirt and debris that can impede movement or seal. Lubricate moving parts with a silicone-based lubricant or light oil, avoiding heavy greases that attract dust. Replace weatherstripping every few years, or sooner in climates with extreme temperatures or intense sun exposure. When replacing the screen, select a high-quality mesh that resists tearing and UV damage. Periodically inspect for wind damage or creases after storms, and re-secure the frame if you notice any looseness. Keeping spare parts on hand, such as extra screws, hinges, and a small screen kit, supports quick fixes during busy seasons. Following these routine steps helps Home Repair Guide readers maintain functional, energy-efficient doors that last longer.
Authority Sources (References and Further Reading)
- Weatherstripping and door seals: Energy.gov – Weatherstripping doors for energy efficiency
- Home repair basics and DIY guidance: University Extension resources (edu domains) for home maintenance and basic carpentry
- General home improvement safety and best practices: Government or university extension sites
These sources provide foundational information on door sealing, frame integrity, and safe DIY practices that complement the hands-on guidance in this article.
Tools & Materials
- Flat-head screwdriver(For prying out damaged spline and adjusting hardware)
- Phillips screwdriver(For hinge screws and strike plate adjustments)
- Tape measure(Accurate door/frame measurements)
- Pliers(Grip components, pull nails or staples as needed)
- Hammer(Optional for minor adjustments or mounting screws)
- Replacement screen material(Choose mesh size appropriate for your window or door)
- Spline roller and spline(For reinstalling screen and ensuring tight fit)
- Replacement weatherstripping(Select matching thickness and profile for your door bottom and sides)
- Replacement hinges or latch (as needed)(Only if current hardware is damaged beyond repair)
- Utility knife(Trim excess screen material or weatherstripping)
Steps
Estimated time: 60-90 minutes
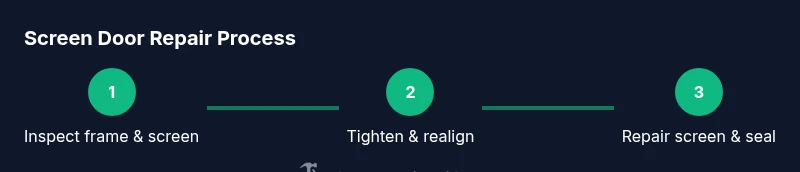
- 1
Inspect door and screen
Look for visible damage: torn mesh, bent hinges, loose screws, or warped frame. Take photos to document the condition before disassembly and note which parts require replacement.
Tip: Use a helper to hold the door steady while you inspect and document. - 2
Tighten and test hardware
With the door closed, tighten hinge screws and test the latch alignment. If screws strip, replace with longer screws that reach solid wood and re-test the door motion.
Tip: Apply a small amount of threadlocker to screws if they tend to loosen over time. - 3
Realign the door
Loosen hinge screws slightly and adjust the door height and side gaps until the latch meets the strike smoothly. Re-tighten screws and check operation from multiple angles.
Tip: Use a level to confirm vertical alignment on both hinges. - 4
Repair or replace the screen
If screen is punctured, remove the old spline, trim the new screen to fit, reinsert using the spline roller, and ensure the mesh tension is uniform without sag.
Tip: Cut screen 1/2 inch larger on each edge to allow for snug mounting. - 5
Update weatherstripping
Measure the existing weatherstripping and cut new material to length. Remove old gasket and press new strip into place along the door frame and bottom sweep.
Tip: Check for even compression; a door that seals well at the top but leaks at the bottom likely needs a different thickness on the bottom sweep. - 6
Test and finalize
Open and close the door repeatedly, listen for rubbing or binding, and look for gaps around the frame. Re-tighten hardware as needed and adjust the latch strike if necessary.
Tip: Keep a simple record of what you replaced and where for future maintenance.
FAQ
What is screen door repair?
Screen door repair encompasses diagnosing and fixing issues with the screen door, including the frame, hinges, latch, screen mesh, and weatherstripping. The goal is to restore smooth operation and a proper seal.
Screen door repair means diagnosing problems with the door, hinges, screen, or weatherstripping and fixing them so the door works smoothly and seals properly.
Can I fix a screen door myself?
Yes, many common problems—like loose hardware, misalignment, screen tears, and worn weatherstripping—are doable with basic tools and some patience. More complex issues, such as a warped frame, may require professional assessment.
Yes, most people can fix common issues with basic tools; major frame damage might need a pro.
How long does screen door repair take?
For typical fixes, plan about 1–2 hours, depending on the door’s condition and your experience. Replacing mesh or weatherstripping can be quicker, while realigning a bowed frame may take longer.
Most repairs take about an hour or two, depending on the problem and your setup.
What if the frame is warped?
A severely warped frame often requires replacement or professional reinforcement. Minor warping can sometimes be corrected by adjusting hinges and shimming the frame, but assess structural integrity first.
Warped frames may need replacement or reinforcement; minor warp can be adjusted.
Where can I buy replacement parts?
Replacement hinges, latches, screen mesh, spline, and weatherstripping are available at most hardware stores and home centers. For specialized sizes, check manufacturer specs or online sellers.
You can buy hinges, screens, and weatherstripping at hardware stores or online.
Do I need to hire a professional for all repairs?
Not for everyday repairs. If you’re comfortable with basic tools and follow guidance, many fixes are DIY-friendly. Seek a pro if the frame is damaged or if you’re uncertain about safety.
Most simple fixes can be DIY, but serious frame damage should be handled by a professional.
Watch Video
Key Takeaways
- Diagnose root cause before repairs
- Prefer simple fixes first to save time and money
- Use proper parts and measure accurately for durable results
- Document replacements for future maintenance