How to Repair TV Screen Near Me: A Practical Guide
Learn safe, practical steps to diagnose and decide on repair versus replacement for a TV screen near you. This Home Repair Guide tutorial covers quick_checks, tool needs, step-by-step actions, and when to call a pro.

If you’re searching for repair tv screen near me, this step-by-step guide helps you diagnose common issues, assess safety, and decide whether to repair or replace. You’ll learn essential tools, simple tests, and when to call a pro. According to Home Repair Guide, start by unplugging the TV, inspecting the screen for cracks, and recording symptom patterns to guide your next move.
Understanding TV Screen Failures: What Goes Wrong
Television screens fail for several reasons, ranging from physical damage to internal component wear. Common failure classes include cracked glass or LCD panels, backlight failures, T-Con driver board faults, and power-supply issues. A failed panel often looks like persistent dark spots or a complete blackout, while backlight problems cause dim or uneven brightness. Input signals from HDMI, composite, or streaming apps can also mimic screen faults, so rule out source problems first. According to Home Repair Guide analysis, most screen-related problems arise from backlights, power supplies, or controller boards rather than the delicate LCD panel itself. Distinguishing these categories helps you choose the right path: safe DIY fixes, professional repair, or cost-effective replacement. This distinction matters whether you’re repairing a budget TV or a high-end OLED, because the repair approach and availability of parts vary widely. As you plan, keep in mind that the goal is to restore a reliable image without risking further damage or voiding a warranty. If your TV is under warranty, consult the manufacturer’s service terms before opening the chassis. If you’re outside of warranty, use this guide to make an informed decision about whether to pursue a DIY diagnostic or hire a certified technician.
Safety First: Unplug, Ground Yourself, and Avoid Hazards
Start by powering down and unplugging the TV from the wall outlet. Do not rely on the remote or power strips; unplug directly to remove all energy stored in capacitors. If the unit is mounted, consider turning off circuit breakers and disconnecting from any surge protection. Before touching any internal components, wait at least one full minute to discharge residual energy, then ground yourself with an anti-static wrist strap or by touching a grounded metal surface. Use non-conductive tools and keep liquids away from the work area. If you see a cracked screen, do not press on the glass or attempt to reseal it; cracked panels can cut you or push fragments into wiring. Wear safety glasses and keep children and pets away. If you are uncertain about disassembly, stop and seek professional help. Safety is the priority because high-voltage capacitors and other live components can cause harm even when the power is off.
Diagnostic Quickchecks You Can Do Without Tools
Check the signal path first: switch inputs, try different HDMI cables, and test with a known-good source. Observe whether the image is completely dark, flickers, or shows color irregularities. If you can faintly see an image when you shine a bright light at the screen, the issue is likely backlight or panel illumination rather than the driver logic. Listen for unusual buzzing or sizzling from the chassis, which can indicate failing power components. Remove external devices to rule out peripheral faults. Reset the TV to its factory settings if safe and documented, and note any error codes on the screen or in the menu. Document symptoms with timestamps so you can share them with a technician later. Remember, some repairs require service manuals and proper PPE; skip invasive steps if you’re unsure.
When to Repair vs. Replace: Evaluating Costs and Value
When a screen shows physical cracks, pressure damage, or severe delamination, replacement of the panel is often the more practical option due to the cost and availability of parts. If the issue is limited to backlight failure, aging driver boards, or power supply quirks, a targeted repair may restore full functionality at a fraction of the cost of a full panel replacement. Rental or resale value may influence your decision as well; for some owners, a functioning TV with a dim backlight is still usable for streaming in a dim room, while others want a perfectly bright image. Warranty status matters: if the unit is still under warranty, factory service or authorized repair is typically preferred. If you’re outside warranty, obtain multiple quotes, compare parts used, and ask for a written labor estimate. The Home Repair Guide team recommends evaluating total cost, expected lifespan after repair, and the availability of replacement parts before committing to a service.
Tools and Materials You Might Need (Overview)
While many repairs require professional tools and expertise, having a basic toolkit helps you perform safe, non-destructive checks. You’ll want a small Phillips and a flat-head screwdriver, a non-conductive pry tool, a digital multimeter to test voltage where permitted, a non-contact voltage tester, an anti-static wrist strap, and a bright flashlight for backlight inspection. Keep microfiber cloths on hand to wipe surfaces without scratching the screen, and a container labeled with its screws to stay organized. If you’re attempting any step that involves removing the back panel, ensure you have a service manual for your exact model and an appropriate static-safe workspace. Optional items like a spare LED backlight strip or replacement panel are only necessary if you’ve confirmed a specific part requires replacement and you’re prepared for a higher-cost repair. Remember: never operate the TV with the back panel removed unless you have a clear, model-specific service procedure.
Common Diagnostic Tests for TV Screens
Non-destructive checks can help you differentiate between panel, backlight, and board issues. A simple backlight test involves directing a bright light at the screen while the unit is on to see if a faint image appears; if so, backlight or LED issues are likely. Inspect the power supply area for swollen capacitors or burnt components—visible damage means professional service is needed. Check connector integrity by reseating external cables and internal ribbon cables (with the power off). If you notice image persistence patterns (burn-in) or color shading that follows the panel rather than the input, suspect the panel or T-Con board. Always document results with timestamps and photos to share with a technician.
Pro Tips for Troubleshooting Safely
Pro tips: label screws and connectors before removing any panels, use a magnetic tray to avoid losing parts, and keep a repair diary with model numbers and symptoms. Wear safety glasses when handling cracked screens and avoid applying pressure to the glass. If you’re unsure about any step, pause and seek professional help. After any component reseating, test the unit in a controlled environment to prevent multiple failures. Finally, only purchase parts after you have a confirmed problem and an in-writing quote from a reputable service provider.
Maintenance Tips to Extend Screen Life
To extend screen life, position the TV away from direct sunlight and heat sources, maintain proper ventilation, and clean the screen with a soft microfiber cloth. Use a surge protector to guard against voltage fluctuations, and avoid touching the screen with sharp or dirty objects. Keep the room humidity moderate and prevent constant on/off cycling by using a simple scheduling device. Regularly dust the vents and housing to reduce heat buildup, and schedule annual checks for power supply health if your set is older or heavily used.
Tools & Materials
- Safety gloves(Insulating, cut-resistant preferred)
- Phillips screwdriver(Sizes #0 to #2 typically fit most back panels)
- Flathead screwdriver(Thin blade preferred for prying panels)
- Non-conductive pry tools(Plastic cards or dedicated PSU-safe tools)
- Digital multimeter(Used to test voltage where permitted by model)
- Non-contact voltage tester(Quick voltage check before touching any wires)
- Anti-static wrist strap(Recommended for sensitive components)
- Bright flashlight(Backlight inspection and shadow testing)
- Microfiber cloth(Non-abrasive cleaning, avoid screen damage)
- Organizer container for screws(Keeps parts in order during disassembly)
- Service manual for exact model(Important for back-panel removal and wiring)
Steps
Estimated time: 2-4 hours
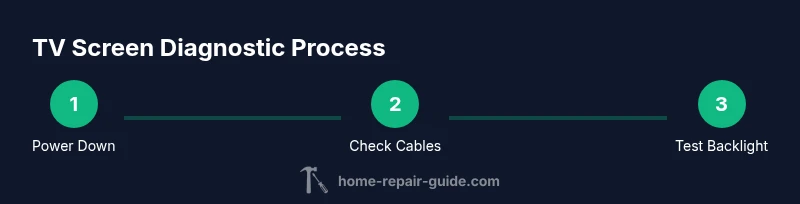
- 1
Power down and unplug
Ensure the TV is completely powered off and unplugged from the wall. Wait at least one minute to discharge residual energy before touching any internal parts.
Tip: Do not rely on the remote or power strip; unplug directly from the outlet to guarantee energy is released. - 2
Inspect external cables and source
Remove and reseat HDMI/AV cables, and try a different input source or device. Confirm the symptom persists across inputs.
Tip: A faulty cable or source often mimics screen issues; isolating the input helps avoid unnecessary disassembly. - 3
Examine the screen and casing for damage
Look for visible cracks, delamination, or glass fracture. Do not press on cracked areas; damaged glass can shard and injure you.
Tip: If you see cracks, stop and seek professional help to avoid injury. - 4
Test backlight visibility with a light source
With the TV on, gently shine a bright light on the screen from the side. If you can see a faint image, backlight or panel illumination is involved.
Tip: Backlight issues are common and can sometimes be repaired by replacing LED strips in older sets. - 5
Check internal connections (only if confident)
If you have the service manual and model-specific guidance, reseat internal ribbon cables and connectors that look loose.
Tip: Never force connectors; seats should be firm but gentle. - 6
Decide on next steps and document
Document symptoms, gather model numbers, and solicit quotes from technicians if repair seems justified. Compare part availability and total projected costs.
Tip: Ask for an itemized estimate with parts, labor, and warranty terms.
FAQ
Can a severely cracked TV screen be repaired, or is replacement the only option?
Severely cracked screens often require panel replacement, which can be costly and may exceed the value of the TV. In many cases, backlight or controller-board issues are repairable at lower cost. Always get a professional diagnosis before deciding.
If the screen is cracked, replacement is usually necessary, but backlight or board problems can sometimes be repaired.
What signs indicate backlight problems as opposed to panel damage?
Backlight problems typically cause dim, uneven, or flickering brightness, even when the image is clear. Panel damage often presents as permanent dark spots, lines, or a fully black image with no LED glow. Testing with a flashlight can help differentiate.
Backlight issues show dim or uneven brightness; panel damage usually looks like dark spots or lines.
Is it safe to open a TV to diagnose problems at home?
Only if you are confident, follow the model’s service manual, and disconnect power. TVs can still hold a dangerous charge in capacitors even when unplugged. If unsure, consult a professional.
Don’t open the TV if you’re not sure—capacitors can still shock you even after unplugging.
Should I hire a professional repair shop near me?
If you lack tools, have no service manual, or the device is under warranty, hiring a licensed technician is prudent. Request written quotes and check for model-specific experience.
If you’re unsure about the repair, getting a local pro is a smart move.
How can I prevent future TV screen problems?
Keep the TV in a well-ventilated area, protect from physical impact, use a surge protector, and clean the screen gently with a microfiber cloth. Regular system updates can also prevent software-related display issues.
Position the TV away from heat, protect it from impacts, and use a surge protector.
What costs should I expect for professional repair?
Costs vary based on the fault, parts, and labor. Expect variability between diagnostics, parts replacement, and whether a panel or board is being repaired.
Costs vary; you’ll usually get a quote before any work begins.
Watch Video
Key Takeaways
- Identify symptom patterns to guide repair vs replacement
- Prioritize safety: unplug, ground, and use PPE when needed
- Backlight and power-supply issues are common TV screen faults
- Obtain written quotes and model-specific guidance before paying for service