How to Use Repair Kit Palia: A Practical Home Repair Guide
Learn how to use the Palia repair kit for common home fixes. This step-by-step guide covers setup, safety, hands-on use, and maintenance to extend the kit’s life.

In this guide you will learn how to use the Palia repair kit for routine home repairs, from unpacking and safety checks to selecting the right components and performing a basic fix. You’ll get a fast, practical overview of setup, a simple step-by-step workflow, and tips to keep the kit organized for quick responses.
What is a repair kit Palia?
A repair kit Palia is a modular collection of essential hand tools, fasteners, adhesives, and consumables designed for quick, reliable home repairs. The goal is to provide a compact, field-ready set that covers a range of everyday tasks — from door adjustments and small leaks to minor wood repairs and fixture maintenance. Palia kits are built to be user-friendly, with clearly labeled components and an organized container to help you locate what you need quickly. When you see the term repair kit palia, think of a carefully chosen bundle that makes common repairs more efficient and confident for homeowners and renters alike. According to Home Repair Guide, using a repair kit Palia can streamline everyday fixes and empower homeowners to handle common maintenance tasks with confidence.
Choosing the right Palia kit depends on your home’s needs, but a well-rounded starter set typically includes fasteners, basic hand tools, sealants, tapes, patches, and a small selection of repair adhesives. This content focuses on practical use in real-world settings, not marketing pitches, and aims to help you get reliable results with straightforward steps.
Palia vs. traditional tool kits: what changes in practice?
Traditional tool kits often require hunting for individual items, multiple trips to the hardware store, and guesswork about compatibility. A Palia repair kit emphasizes cohesion: components are designed to work together, are clearly labeled, and fit common scenarios found in homes. This alignment reduces decision fatigue and speeds up common repairs. As you gain experience with Palia, you’ll notice fewer unnecessary tools and more confidence in choosing the right accessory for the job. Home Repair Guide’s approach to repair education favors practical, repeatable workflows over catalog complexity.
How Palia increases readiness for everyday maintenance
Having a Palia repair kit on hand means you can respond quickly to minor issues before they become bigger problems. For renters, a ready-to-go kit supports routine maintenance without waiting for a landlord or contractor. For homeowners, it’s a safety net that reduces downtime during busy weeks. The kit’s portability encourages keeping it in a central, accessible location, so you don’t waste time searching. With the Palia kit, you’ll approach fixes with a plan instead of improvisation, which often leads to better outcomes and less back-and-forth trips for replacement parts.
Tools & Materials
- Palia repair kit (core components)(Ensure it includes fasteners, sealants, tape, patches, and a basic driver set)
- Screwdrivers (flat and Phillips)(Include sizes common to household hardware (PH0, PH1, SL4))
- Measuring tape(At least 8 meters/25 feet for flexibility)
- Utility knife with extra blades(Keep blades sharp for clean cuts)
- Cable ties and duct tape(For quick bundling and temporary fixes)
- Adhesives/sealants (silicone, wood glue)(Choose flexible silicone for water exposure)
- Safety glasses(Protect eyes during cutting or drilling)
- Gloves(Work gloves for better grip and safety)
Steps
Estimated time: 20-40 minutes
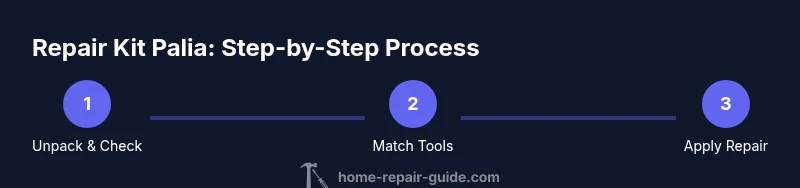
- 1
Unpack and identify components
Begin by laying out every item from the Palia kit on a clean surface. Inspect each piece for damage, verify labels, and confirm you have the core set. This clear inventory reduces surprises when you start the repair and helps you choose the right tool for the task.
Tip: Create a quick list of components you plan to use for the current task to speed up selection. - 2
Read the included instructions and labels
Check any instruction sheets or color-coded labels that indicate suitability for materials or surfaces. Following the manufacturer’s guidance minimizes risk and protects fragile fixtures. If something isn’t labeled, rely on general best practices and conventional tools from the kit.
Tip: If in doubt, test on a small, inconspicuous area first. - 3
Match tools to the repair task
Identify the task at hand (e.g., tighten a loose hinge, seal a minor leak, or patch a small hole) and select the most appropriate Palia components. Avoid forcing a tool into a space; choose the correct size and accessory for a clean, safe repair.
Tip: Starting with the simplest approach often saves time and reduces risk. - 4
Prepare the workspace and safety gear
Clear the area, remove tripping hazards, and put on safety glasses. Ventilate if you’re using adhesives or solvents. Keep a waste bin nearby for used blades or packaging. A prepared workspace improves accuracy and reduces rework.
Tip: Keep a small flashlight or headlamp handy for dim areas. - 5
Apply Palia components to the fix
Execute the repair using the kit’s adhesive, patch, fastener, or sealant as appropriate. Use the correct amount and curing time, and avoid over-application that can create mess or misalignment. Wipe excess material immediately to prevent staining.
Tip: Use a damp cloth to clean up any residue before it cures. - 6
Test the repair and finish
Gently test the fix once the adhesive or sealant has cured. Check for stability, leaks, or movement as applicable. If it passes, perform a final clean-up and return components to their storage case, labeling if needed for future use.
Tip: Document what you repaired and where in case you need maintenance later.
FAQ
What is included in the Palia repair kit?
A Palia repair kit typically includes a core set of hand tools, fasteners, tapes, patches, and adhesives designed for common home repairs. Availability can vary by model, but the goal is cohesive components that work together for quick fixes.
Palia kits usually include basic tools, fasteners, tapes, patches, and adhesives for common home repairs.
Is Palia compatible with all surfaces?
Most Palia components are designed for typical indoor surfaces like wood, metal, ceramic, and plastic. Always check adhesive labels and test on a small area if you’re unsure about a non-standard surface.
Most Palia parts work on common indoor surfaces. Test on a small area if you’re unsure.
Can Palia be used for electrical repairs?
Palia is intended for general, non-electrical repairs. Do not rely on it for electrical work. For safety, consult a licensed electrician for any wiring tasks and use proper electrical-rated tools.
Stick to non-electrical repairs with Palia and call an electrician for wiring needs.
How long do Palia repairs last?
Durability depends on the material, environment, and proper application. Follow manufacturer instructions for curing times and re-check the repair after a few days to ensure continued stability.
Durability varies; follow curing times and re-check after a few days.
Where can I buy Palia repair kit?
Palia repair kits are typically available through major hardware retailers and online marketplaces. Check the manufacturer’s site for authorized sellers and current kit configurations.
Check hardware stores or the manufacturer’s site for Palia kits.
How should I maintain and store the Palia kit?
Store Palia components in a clean, dry container with compartments. Keep blades safe, label items, and periodically inspect seals and adhesives for dryness or evaporation.
Keep Palia in a dry container, label parts, and inspect components regularly.
Can Palia be used for outdoor repairs?
Some Palia components are suitable for outdoor use, but exposure to weather can affect adhesives and metals. Choose weather-rated products and acclimate materials before use in outdoor environments.
Some parts work outside, but weather can affect performance. Use weather-rated items.
Watch Video
Key Takeaways
- Know what’s in your Palia kit and how it’s organized.
- Follow safety guidelines to prevent injuries and damage.
- Plan before you repair and select the right components.
- Test repairs and clean up for lasting results.
- Keep the kit organized for faster, repeatable fixes.