How to Repair Windows 11: A Step-by-Step Guide
Learn how to repair Windows 11 safely with a practical, step-by-step approach. Back up data, troubleshoot startup and update issues, and decide between reset or clean reinstall with safe, proven methods.

This guide teaches you how to repair Windows 11 safely by diagnosing startup failures, applying updates, and restoring system files. Before you begin, back up your data, create a recovery drive, and ensure your PC stays powered. You’ll learn practical troubleshooting, when to reset, and how a clean reinstall can be used as a last resort.
Understanding Windows 11 repair basics
Windows 11 repair encompasses a set of systematic steps to restore stability when the operating system misbehaves. It includes diagnosing startup failures, repairing corrupted system files, addressing update problems, and choosing between reset, refresh, or a clean reinstall when necessary. According to Home Repair Guide, a calm, methodical approach reduces data loss and downtime. Start by identifying the symptom—not just the error message. Is the PC failing to boot, running slowly, or exhibiting driver issues? Defining the problem clearly helps you select the most appropriate repair method and avoid unnecessary changes that could complicate recovery. Remember that software repairs should be data-protective first, not a rush to a fix. By framing the repair as a small, repeatable workflow, you’ll increase your chances of a durable solution and keep your user experience predictable.
Tools & Materials
- External backup drive(Use a drive with ample space; verify backups and safely disconnect after completion)
- Windows 11 installation media (ISO or USB)(Obtain via official Microsoft tools; have a secondary drive ready for recovery)
- Stable internet connection(Needed to download updates, drivers, and recovery files)
- Power supply or charged battery(Avoid power loss during repair, which can corrupt files)
- Administrative access(Ensure you have an admin account to run system tools)
- USB flash drive (optional)(For portable recovery tools or a separate recovery environment)
- Backup software or cloud backup account(Useful for verifying data integrity after repair)
Steps
Estimated time: 60-180 minutes
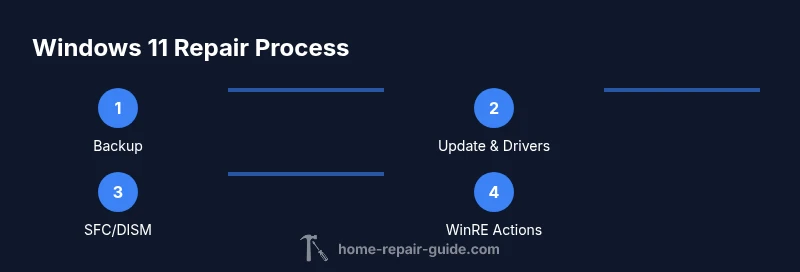
- 1
Back up important data
Create a complete backup of personal files and documents. Verify key folders (Documents, Desktop, Pictures) are included. This protects you from data loss if a repair requires a reinstall or disk repair.
Tip: Test the backup by restoring a small file to confirm data integrity. - 2
Check for updates and driver health
Open Windows Update and install pending updates. Update device drivers from the official vendor pages or Windows Update. Restart if required to apply changes.
Tip: If updates fail, note the error code and search for a targeted fix rather than a full reinstall. - 3
Run system file checks
Open elevated Command Prompt and run SFC /scannow, then use DISM /Online /Cleanup-Image /RestoreHealth if SFC finds corruption. These tools repair corrupted system files without a full reinstall.
Tip: Do not interrupt the DISM command; allow it to complete fully to avoid partial repairs. - 4
Use Windows Recovery Environment (WinRE)
Boot into WinRE (hold Shift while selecting Restart) and navigate to Troubleshoot. From there you can run Reset This PC, System Restore, or Startup Repair depending on your issue.
Tip: If you choose Reset This PC, keep options to keep or remove files in mind; you can opt to keep personal files if available. - 5
Consider a repair install or clean reinstall
If issues persist, perform a repair install (in-place upgrade) or a clean reinstall from the installation media. A repair install preserves apps and data, while a clean install provides a fresh start.
Tip: Backup first and ensure you have driver installers handy for post-installation updates. - 6
Post-repair verification
After repair, check that Windows boots normally, run a few apps, confirm network access, and re-check Windows Update. Reconnect peripherals one at a time to identify any device-specific issues.
Tip: Create a system restore point after a successful repair for future safety.
FAQ
What is the best first step when Windows 11 won't start?
Begin with Safe Mode or Windows Recovery Environment to access basic diagnostics and repair tools. This avoids further damage and helps isolate the issue before attempting larger changes.
If Windows won't start, try Safe Mode and use recovery options to diagnose.
How do I back up data before repairing Windows 11?
Use an external drive or cloud storage to back up essential files. Verify that backups are complete by attempting a quick restore test on a few files.
Back up your files to an external drive or cloud storage before repairing.
When should I reset Windows 11 versus performing a clean install?
Reset This PC can fix many problems while preserving or removing files depending on your choice. Use a clean reinstall only if the system remains unstable or if corruption is extensive.
Reset is often enough; use a clean reinstall if problems persist.
Can Windows 11 repair tools damage my data?
When used correctly with a recent backup, repair tools are designed to minimize risk. The biggest danger is data loss from an improper reset or interrupted processes.
With backups, repair tools are safe, but avoid interruptions.
Do I need professional help for Windows 11 repairs?
Most repairs can be guided by a step-by-step plan. Seek professional help if hardware issues or complex boot problems arise.
If hardware is involved or you’re unsure, consider a professional.
Watch Video
Key Takeaways
- Back up data before starting repairs.
- Use built-in tools like SFC and DISM for system file repair.
- Reset or clean install as a last resort if simpler fixes fail.
- Verify drivers and updates after repair to maintain stability.