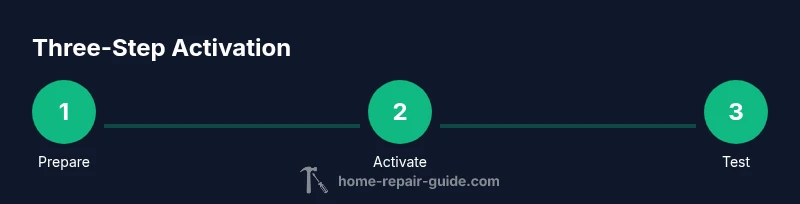
How to Put Service on iPhone: Step-by-Step Activation
Learn how to activate service on your iPhone with SIM or eSIM, carrier setup, and initial testing. This practical, homeowner-friendly guide from Home Repair Guide covers prerequisites, activation paths, and troubleshooting to get you connected quickly in 2026.

This guide shows how to put service on an iPhone, covering SIM insertion or eSIM activation, carrier activation, and initial setup. You’ll verify your plan, connect to Wi‑Fi, sign in with your Apple ID, and confirm data and calling are working. Whether you’re switching carriers or starting fresh, following these steps will activate service reliably.
What activating service on an iPhone actually involves
Activating service on an iPhone means enabling voice, text, and data through a carrier so your device can connect to networks. There are two main paths: using a physical SIM card or enabling an electronic SIM (eSIM). The Home Repair Guide team notes that the process includes selecting a activation path, provisioning the plan with your carrier, and confirming the device can access cellular data. Assess your device compatibility (most iPhones support eSIM) and ensure your iCloud and Apple ID are ready for setup. By understanding these elements, you’ll approach activation with confidence and minimize delays. According to Home Repair Guide, a clear activation sequence helps prevent common hiccups during the first few minutes of service.
Key terms to know: SIM card, eSIM, carrier activation, Apple ID. If you’re activating a used device, verify it isn’t carrier-locked and that you have permission to use the plan. If you encounter issues, follow the structured steps below and consult your carrier’s activation resources as needed.
Preparation: prerequisites and planning
Before you begin, assemble what you’ll need and confirm prerequisites so activation goes smoothly. Ensure you have an iPhone model that supports your activation path (SIM or eSIM) and a working internet connection. Keep your Apple ID credentials handy for signing in and enabling services like iMessage and FaceTime. Check you have any carrier-provided information (account number, PIN, or QR code) if you’re setting up an eSIM or troubleshooting. Home Repair Guide emphasizes verifying your device’s iOS version is up to date, as some carrier activation features rely on newer software. By lining up these elements, you’ll reduce interruptions and have a smoother setup experience.
- Have your carrier plan ready and confirmed
- Ensure Wi‑Fi or mobile data is available for activation
- Update iPhone to the latest iOS version
- Sign in with your Apple ID to access iCloud and services
- Back up important data in case you need to restore
Activation paths: SIM vs eSIM – what to choose and how to proceed
Your activation path depends on your device and carrier. A physical SIM card is straightforward: insert the SIM, restart the iPhone if prompted, and follow on-screen prompts to activate. An eSIM relies on a QR code or carrier app to install the digital SIM profile; this path is convenient for dual-SIM setups and switching carriers quickly. The Home Repair Guide approach emphasizes choosing the path most compatible with your carrier’s offerings and your device model. If you’re unsure, contact your carrier for compatibility and timing estimates. After choosing a path, continue with the steps that apply to your setup.
- Physical SIM: insert into SIM tray, restart, follow prompts
- eSIM: scan QR code or use carrier app to install profile
Carrier activation and iPhone setup: getting connected
With the path chosen, begin the official activation. Follow on-screen prompts or call your carrier if required to provision the line on their network. You’ll likely be asked to sign in with your Apple ID to enable iCloud, iMessage, and FaceTime, and to configure cellular data settings. Ensure roaming is set according to your travel needs and confirm APN settings if your carrier requires them. The activation process may prompt you to enable data usage for initial setup; allow this so the device can complete notifications, app downloads, and updates. Home Repair Guide reminds readers to stay patient during this step, as provisioning on some networks can take several minutes to complete.
- Complete on-screen prompts or contact carrier if needed
- Sign in with Apple ID and enable iCloud services
- Enable cellular data and adjust roaming as needed
- If prompted, verify APN settings with your carrier
Verify, test, and finalize your connection
After activation, perform a quick test to verify your service. Try placing a call, sending a text, and enabling mobile data to load websites or apps. Check that your iPhone shows network bars and the carrier name. Test in a few locations if possible to ensure consistent coverage. If you notice data issues, revisit Settings > Cellular > cellular data options and confirm data roaming and preferred network settings align with your carrier’s recommendations. The goal is to confirm voice, text, and data all function correctly before you finish the setup.
- Make a test call and send a message
- Open a webpage or app to confirm data works
- Verify roaming and network settings match carrier guidance
Troubleshooting common activation issues
If activation stalls or fails, restart the device and re-try the activation flow. Ensure you have a stable internet connection and that you’re using the correct SIM or eSIM profile for the active line. Contact your carrier if you see error messages or provisioning delays; some activations require carrier authorization or device re-enrollment. For persistent problems, check for iOS updates and try again after updating. Home Repair Guide suggests documenting the exact error codes or prompts you encounter so the carrier can assist more effectively.
Tools & Materials
- iPhone device(Ensure it is unlocked or compatible with your carrier.)
- Carrier SIM card (physical)(Needed only if using the physical SIM path.)
- eSIM activation details(Obtain QR code or carrier app access from your carrier.)
- Stable internet connection(Wi‑Fi works best during activation.)
- Apple ID and password(Needed to set up iCloud and services.)
- Charger and cable(Keep device powered during setup.)
Steps
Estimated time: 15-40 minutes
- 1
Prepare your iPhone and gather essentials
Collect the device, charger, and any carrier information. Confirm you have an active plan or eSIM details and ensure your Apple ID is accessible. This saves time and reduces interruptions during activation.
Tip: Have your carrier account details ready to speed verification. - 2
Check compatibility and choose activation path
Verify your iPhone model supports your chosen path (SIM or eSIM). If you’re unsure, contact your carrier for compatibility and timing. Selecting the right path early prevents missteps later.
Tip: If possible, prefer eSIM for faster provisioning and flexibility. - 3
Insert physical SIM (if using SIM path)
Power off the iPhone, insert the SIM card into the SIM tray, and reinsert the tray. Power the device back on and follow on-screen prompts to begin activation.
Tip: Handle the SIM tray gently to avoid damage. - 4
Set up eSIM (if using eSIM path)
In Settings > Cellular, choose Add Cellular Plan and scan the carrier's QR code or install via the carrier app. Wait for the profile to verify and apply. This step enables the digital SIM on your device.
Tip: Ensure you’re connected to the internet during this process. - 5
Connect to Wi‑Fi and sign in with Apple ID
Join a stable Wi‑Fi network and sign in with your Apple ID to enable iCloud, iMessage, and FaceTime. This also assists with app and OS updates needed for activation.
Tip: If you forgot your Apple ID, use Apple’s account recovery options. - 6
Activate service with your carrier
Follow on-screen prompts or contact your carrier to provision the line. This may include confirming plan details and agreeing to terms. Once approved, the device should register on the network.
Tip: Keep carrier contact info handy in case of prompts or delays. - 7
Test a call, data, and messages
Place a test call, load a webpage, and send a message to confirm voice, data, and SMS are working. Check for roaming or network preferences if you travel.
Tip: If data isn’t working, check Settings > Cellular > Cellular Data Options and APN settings with your carrier.
FAQ
Do I need a physical SIM card to activate service on iPhone?
Not always. Many iPhones support eSIM and can activate service without a physical SIM. If your carrier supports eSIM, this can simplify switching and activation.
You may not need a physical SIM if your carrier supports eSIM activation; many iPhones today are ready for digital SIM provisioning.
How long does activation typically take?
Activation usually takes just a few minutes, but it can take longer if the carrier needs to provision the line or verify your account.
Activation is usually quick, but it can take a bit longer if your carrier needs to verify your account.
Can I activate service without Wi‑Fi?
Yes, if your carrier provisions the line over the cellular network or uses an on-device setup, but a stable internet connection speeds up activation.
You can activate using cellular data if needed, but a reliable Wi‑Fi connection helps.
What should I do if activation fails?
Restart the iPhone, reattempt the activation flow, and confirm carrier requirements. If issues persist, contact your carrier with any error messages.
If activation fails, restart the device and contact your carrier for help with the error messages.
Will activation affect my existing data?
Activation itself should not erase data, but it’s smart to back up before starting. Ensure you’re signed in to iCloud to preserve settings and apps.
Activation won’t erase your data, but backing up beforehand is wise.
Watch Video
Key Takeaways
- Choose the correct activation path based on device and carrier.
- Sign in with your Apple ID to enable services early.
- Test voice, data, and messaging after activation.
- If activation fails, contact your carrier with error details.