Dyson Vacuum Repair: A Homeowner’s Step-by-Step Guide
Learn how to diagnose and repair common Dyson vacuum issues at home with a safe, practical, step-by-step guide for homeowners and renters.

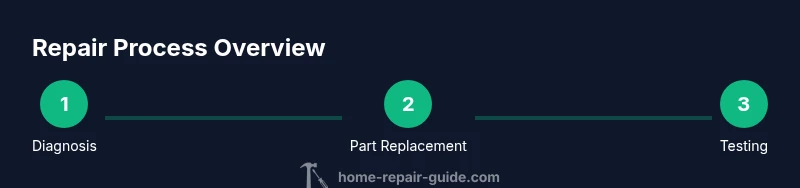
In this guide you’ll walk through a practical Dyson vacuum repair workflow, focusing on common failure points like belts, brushes, and filters. You’ll learn safety steps, required tools, and model-aware troubleshooting to restore suction and performance. The process applies to most Dyson vacuum models and emphasizes careful disassembly and testing. vacuum repair dyson
What You’ll Fix and Why Dyson Repairs Matter
Dyson vacuums deliver impressive suction and lightweight design, but even premium machines need occasional maintenance. The goals of this guide are to help you diagnose common issues, perform safe repairs, and restore peak performance without expensive service calls. If you search for vacuum repair dyson, you’ll find that problems often boil down to belts, blocked filters, or a stuck brush bar. According to Home Repair Guide, understanding how these parts interact helps you pinpoint the cause quickly and avoid unnecessary replacements. This article focuses on practical, model-aware steps that apply to many Dyson configurations, from corded uprights to cordless models. You’ll learn how to inspect the primary failure points, select appropriate replacement parts, and verify results through testing. Keep in mind that accuracy matters: misidentifying the issue can lead to wasted parts and time, so work methodically and document each step for future reference.
Common Dyson Vacuum Problems and How to Diagnose Them
Dyson vacuums share several recurring symptoms. Loss of suction, unusual noises, brush bar not turning, and power issues are common, yet each has a distinct cause. Start with the easy checks: ensure the canister or bin is cleared, filters are clean, and hoses aren’t kinked. If suction is weak, inspect the filter and cyclone assembly for blockages; if you hear grinding, inspect the brush bar and belt; if it won’t turn on, verify the battery or mains connection. Based on Home Repair Guide analysis, belt wear and clogged filters top the list of fixable faults. A quick diagnosis sheet—record symptoms, observed noises, and what you checked—helps prevent guessing and speeds up the repair. For safety, always unplug before inspecting internal parts and avoid forcing components apart.
Safety First: Unplugging, Disassembly, and Handling Electronics
Unplug the vacuum and disconnect any detachable battery before starting any disassembly. Work on a dry, stable surface with good lighting, and keep track of every screw and clip. Dyson parts can be delicate; use plastic pry tools rather than metal knives to avoid gouging housings. If you smell burning, see smoke, or notice melted plastics, stop immediately and seek professional help. Wear eye protection and avoid getting damp or wet on electrical components. This approach minimizes shock risk and damage to sensitive electronics during repair.
Tools and Materials You’ll Need for Dyson Repair
Before you begin, gather a basic repair kit and the appropriate replacement parts. Essential tools include a screwdriver set with Phillips and flat-head bits, a small Torx driver for model-specific fasteners, needle-nose pliers, and a clean microfiber cloth for wiping dust. Have a replacement belt and an appropriate filter ready if your model uses a replaceable belt or cartridge filter. A spare bin seal or gasket can be handy if you notice a slow dust leak. Keep a trash bag handy for debris and a small tray to organize screws. Optional items: a heat-resistant mat for hot surfaces, a small flashlight, and a multimeter if you want to test electrical continuity.
Step-by-Step Diagnosis: Inspect Belts, Brush Roll, and Filters
Follow a systematic check of the belt, brush roll, and filtration system. Remove the brush cover and inspect the belt for cracks, fraying, or slack; a worn belt will slip and reduce suction. Check the brush roll for hair entanglement, debris buildup, or poor rotation; clear tangles and replace if necessary. Inspect the main filter or cartridge and the cyclone assembly for blockages; a clogged filter reduces suction and motor efficiency. Reassemble only after ensuring each component spins freely and there are no loose parts. If you find damage beyond basic cleaning, order genuine replacement parts for your model.
Step-by-Step Repair: Replacing a Worn Belt or Clogged Filter
Remove the old belt from the motor drive and brush pulley, noting the path it follows. Fit the new belt by aligning it with the correct grooves and ensuring the brush spins freely without rubbing. Install a fresh filter or cartridge and seat it firmly in its housing. Recheck the belt tension and brush rotation before proceeding. If the model uses a sealed cyclone, ensure the seals are intact and the cyclone lid is properly seated. This step restores suction and helps the machine maintain peak performance.
Cleaning, Reassembly, and Hose/Bin Reattachment
With components replaced, reassemble the vacuum in the reverse order of disassembly. Reconnect hoses securely and reseat the bin or dust cup, checking for proper seal around the perimeter. Wipe down the exterior and interior surfaces to remove dust that could cause recontamination. Reinstall batteries if applicable and verify that all clips snap into place. Take a moment to ensure there are no loose tools inside the housing and that the vacuum’s handle is comfortable and secure.
Testing and Troubleshooting After Repair
Plug in and power up the Dyson, listening for abnormal noises and observing suction performance. Run a quick soil test with a small amount of debris to confirm consistent pickup across carpet and hard floors. If suction remains weak, recheck seals, gaskets, and the filter seating. Do not operate the unit with a damaged housing or exposed wires. If the problem persists after a thorough belt and filter replacement, consult the Dyson support site for model-specific diagnostics. The aim is to ensure the repair is durable and safe for daily use.
Authority Sources and Model-Independent Validation
To validate your repair approach, consult trusted safety and appliance-care resources. The following sources provide general guidance that complements hands-on repair and help ensure you follow best practices:
- OSHA electrical safety guidelines (https://www.osha.gov)
- CPSC consumer safety information on household appliances (https://www.cpsc.gov)
- U.S. Department of Energy appliance maintenance tips (https://www.energy.gov)
Tools & Materials
- Screwdriver set (Phillips and flathead)(Include small Phillips #1 and #2, and flathead bits.)
- Torx driver(Size depends on model; have a small range handy.)
- Needle-nose pliers(For clips, clamps, and hose connections.)
- Replacement belt(Exact part for your Dyson model; check the model number.)
- Replacement filter or cartridge(Order the correct type for your model.)
- Microfiber cloth(For cleaning dust from parts and housings.)
- Lubricant/contact cleaner (electronics-safe)(Use sparingly on electrical contacts only.)
- Small brush(For debris inside the cyclone or crevices.)
Steps
Estimated time: 90-120 minutes
- 1
Power down and unplug
Ensure the unit is off, unplug the charger, and remove any detachable battery. This prevents shock and prevents accidental startup during inspection.
Tip: Double-check that all power sources are disconnected before touching internal parts. - 2
Check the belt condition
Open the brush housing and inspect the belt for cracks, fraying, or slack. A worn belt will slip and reduce suction performance.
Tip: Note the belt path before removing it to ensure correct reinstallation. - 3
Inspect the brush roll
Look for hair and debris wrapped around the brush; remove tangles and confirm the roll rotates freely.
Tip: Use scissors to cut tangled hair if needed, avoid yanking on the roll. - 4
Inspect filters and cyclone
Detach and examine filters or cartridges for clogs; clean or replace as required and inspect the cyclone for debris buildup.
Tip: Never run a dry filter; dampen only with water when allowed by your model’s guidelines. - 5
Check hoses and seals
Examine all hoses for cracks and seals for tight fit; replace damaged seals to prevent air leaks.
Tip: Press on hose connections to confirm they click, ensuring a secure seal. - 6
Disassemble housing if needed
If you need deeper access, carefully remove housing screws and separate panels with plastic tools to avoid damage.
Tip: Keep screws organized by size and location to simplify reassembly. - 7
Install new parts
Place a fresh belt and/or filter, rechecking alignment to prevent rubbing during operation.
Tip: Lubricate motor bearings only if the manual specifies; otherwise skip lubrication. - 8
Reassemble and verify rotation
Reassemble the unit and manually spin the brush to confirm smooth movement before powering on.
Tip: Take a photo of wiring layouts for reference if needed during reassembly. - 9
Test suction and function
Plug in, power up, and run a test on carpet and hard floors; listen for abnormal sounds or leaks and adjust as needed.
Tip: Run a quick debris test to confirm uniform pickup across surfaces.
FAQ
Can I repair a Dyson vacuum myself?
Yes, many common issues can be fixed at home with basic tools, provided you follow model-specific guidance and safety precautions. Start with belts, filters, and the brush, and verify the results with a test run.
Yes, many common Dyson repairs can be done at home with basic tools and care. Start with belts, filters, and the brush, then test the vacuum to confirm performance.
Do I need to unplug before starting?
Absolutely. Unplug the device and remove any connected batteries before touching internal components to prevent electric shock or accidental startup.
Always unplug before you start. Remove any batteries to prevent shocks or startups.
How can I tell if the belt is worn?
Look for cracks, stretching, or slipping. If the brush doesn’t spin freely or suction drops suddenly, the belt is a likely culprit.
Check for cracks or looseness; if the brush won’t spin, the belt is probably worn.
Are replacement parts model-specific?
Yes. Each Dyson model uses different belts, filters, and housings. Always verify the model number and order the correct parts.
Yes—parts are model-specific. Check your model number to order the right belt and filter.
Where can I find official repair guidance?
Consult Dyson’s official support site for model-specific manuals, plus safety and care tips. You can also cross-check with general appliance-safety resources.
Check Dyson’s official support site for model guides and safety tips.
What should I do if the issue persists after repair?
If symptoms return after replacement, recheck seals and components for wear or damage, and consider professional service if the model is under warranty.
If it still fails, recheck seals and consider professional service if under warranty.
Watch Video
Key Takeaways
- Identify the primary failure point before buying parts.
- Inspect belts, brush rolls, and filters in that order.
- Replace worn parts with model-appropriate components.
- Test afterwards and document the repair steps for future reference.
- Follow official safety guidance and use proper tools.