Maytag Washer Repair Technician: Step-by-Step Guide
Learn when to call a maytag washer repair technician, what to expect during diagnosis, and how to prepare for service. This comprehensive, step-by-step guide covers DIY troubleshooting, professional thresholds, and maintenance tips for 2026.

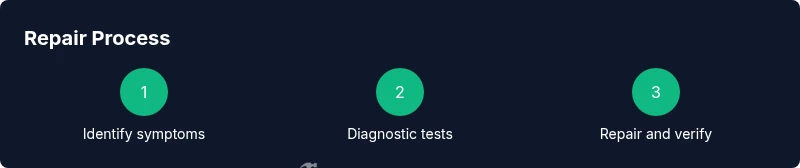
By reading this guide, you will know when a Maytag washer needs repair, what a Maytag washer repair technician will check, and how to prepare for a service visit. You’ll learn to distinguish simple DIY fixes from professional service, understand typical visit scopes, and avoid unnecessary costs by documenting symptoms and model details before the technician arrives.
Common Symptoms a Maytag Washer Needs Repair
When a Maytag washer starts acting up, it's tempting to blame a simple nuisance. According to Home Repair Guide, many symptoms point to a failing component rather than user error. Common signs include failure to drain, loud banging during spin, clothes not rinsing properly, excessive vibrations, leaks around the door seal, or the washer filling with unexpected water. Pay attention to pattern: does the issue occur on a specific cycle, or is it intermittent? A full symptom log—when it happens, what you see, and whether water is present—helps a repair technician narrow down culprits quickly. For many models, the lid switch or pump assembly is a frequent culprit; however, control boards or sensors can fail without obvious external signs. Before calling a technician, confirm basic things: outlet is powered, circuit breakers are not tripped, hoses are secure, and the door latch closes firmly. If you notice a burning smell or smoke, stop using the machine and seek immediate professional help. Document the model number, serial, and recent service history; this information reduces diagnostic time and ensures the technician brings the right replacement parts. Understanding these symptoms helps you decide whether to attempt DIY fixes or schedule a Maytag washer repair technician.
How a Maytag Washer Repair Technician Diagnoses Issues
A professional approaches diagnosis with a systematic checklist. The technician will start with safety and basic functionality: unplug power, shut off water supply, and inspect hoses for kinks or leaks. They will review error codes displayed on the control panel, which guide the initial hypotheses. Next, they’ll perform a physical inspection of wear-prone components like the lid switch, door latch, pump, and drain hose. With modern Maytag models, onboard diagnostics can reveal sensor or control-board faults that aren’t visible. The technician will verify grounding and assess electrical continuity with a multimeter, testing for voltage drops that indicate a failing component. Documentation from the user—such as when the problem started, cycles affected, and any unusual noises—helps the technician reproduce the symptom in a controlled test. The goal is to isolate the fault to a specific module so parts ordering and repair time stay efficient. In some cases, a temporary workaround can restore function, but it’s essential to confirm the root cause before committing to a replacement part. Home Repair Guide suggests keeping a log of codes and tests for future maintenance.
DIY Troubleshooting vs. Professional Service: When to Call
DIY troubleshooting can fix many common issues, especially with older, simpler Maytag washer models. However, professional service is recommended for persistent leaks, electrical faults, or components inside the drum or control board. Start with basic checks you can safely perform: verify power, inspect hoses, clean lint filters, and run a test cycle with no clothes to observe behavior. If the problem persists after these steps, scheduling a visit from a Maytag washer repair technician often saves time and protects other parts from collateral damage. Note that some models have complex wiring or sealed hardware that requires specialized tools and procedures.
The decision to call a pro should consider risk factors, your comfort level, and the potential cost of incorrect DIY fixes. A trained technician can source genuine parts, ensure electrical safety, and provide a diagnosis with an itemized repair plan. Home Repair Guide emphasizes documenting symptoms and keeping track of what has been tried so the technician can work efficiently.
How to Prepare for a Technician Visit and What to Expect
To maximize the value of a service call, prepare a concise problem history and a tidy workspace. Gather the model number, serial, and recent service notes. Clear the area around the washer for easy access to hoses and the rear panel; remove bulky items from nearby shelves to prevent accidental damage. Before the technician arrives, ensure the machine is disconnected from power and water to reduce risk during inspection. When the Maytag washer repair technician arrives, expect a formal diagnostic process, an itemized parts list, and a transparent estimate for labor and parts. They may perform tests in stages to verify root cause, explain their findings in plain language, and discuss maintenance steps to prevent recurrence.
If new parts are required, ask about warranty coverage and the expected lifespan of the replacement components. After service, request a quick demonstration of the repaired function and guidance on routine maintenance practices to extend the machine’s life. Home Repair Guide recommends following up with a brief maintenance schedule to avoid future calls for the same issue.
Choosing the Right Maytag Washer Repair Technician: Questions to Ask
Selecting the right professional matters as much as the diagnosis itself. Start by verifying license and insurance where required, and check that the technician has experience with Maytag models and the specific symptom you’re facing. Ask for a written estimate that separates labor, parts, and disposal fees, along with the expected timeline. Inquire about availability for same-day or next-day service and whether the parts are genuine Maytag replacements or aftermarket equivalents. Request references or reviews, and confirm warranty terms for parts and labor. A good technician will explain the fault, show you the evidence, and provide clear next steps. Keep a copy of the diagnostic report and ensure you have a plan for future maintenance with Home Repair Guide’s best practices in mind.
Tools & Materials
- Screwdriver set (flat-head and Phillips)(Both slotted and Phillips heads for access panels)
- Multimeter(For checking electrical continuity and voltage)
- Wrench/adjustable spanner set(Sizes typically 8-14 mm used on hoses and fittings)
- Pliers (needle-nose and groove)(Grip hoses and clamps during inspection)
- Towels, bucket, and rags(Contain spills and clean up leaks)
- Owner's manual and model number(Helps locate service bulletins and specs)
- Flashlight / headlamp(Illumination for dark access panels)
Steps
Estimated time: 60-120 minutes (for self-diagnosis and prep)
- 1
Power down and secure utilities
Unplug the washer and turn off the hot/cold water supply. Disconnect hoses carefully to prevent leaks during inspection and set aside in a tray or towel to catch drips. This step reduces the risk of electric shock while you inspect for obvious faults.
Tip: Always begin with safety; never attempt repairs with the circuit energized. - 2
Document symptoms and gather data
Create a concise history: when the issue started, cycles affected, noises or leaks, and whether a specific load triggers the problem. Photograph any visible damage and note error codes shown on the control panel.
Tip: A clear symptom log speeds up diagnosis and reduces back-and-forth with the technician. - 3
Inspect common wear items
Examine the lid switch, door latch, drain pump, hoses, and filter (if applicable). Look for cracks, clogs, or loose connections. Run a brief dry cycle to see if the drum spins freely.
Tip: Concrete signs (clicks, clanks, leaks) point to the culprit without guessing. - 4
Test electrical and control components
With the machine unplugged, perform a visual check of wiring for loose connections. If you have the skills, use the multimeter to verify continuity on switches and the control board; otherwise leave this to a pro.
Tip: Electrical tests should only be performed if you’re confident; faulty testing can cause more damage. - 5
Decide on DIY vs professional repair
If the fault is isolated and simple (e.g., clogged filter or loose hose), you may perform the fix. For motor, bearings, or control-board issues, schedule a Maytag washer repair technician to avoid further damage.
Tip: Err on the side of safety; complex components usually require a pro. - 6
Prepare for the technician visit
Provide the diagnostic log, model/serial, and a list of any parts you’ve inspected or replaced. Clear space, ensure accessibility, and ask for a written estimate before any work begins.
Tip: Having everything ready minimizes downtime and improves the first-visit success rate.
FAQ
What are the most common Maytag washer problems?
Many Maytag washers fail due to clogged pumps, faulty lid switches, or worn door seals. Leaks, failure to drain, and unusual noises are frequent symptoms. A technician can confirm the exact cause after diagnostics.
Common problems include leaks, failure to drain, and strange noises. A technician will diagnose the exact cause after a careful check.
Can I fix a Maytag washer myself?
Simple issues like unclogging a pump or replacing a worn hose can be DIY if you’re comfortable with basic tools. More complex problems involving control boards or drum bearings usually require a Maytag washer repair technician.
You can tackle simple fixes like clogged pumps if you’re comfortable with basic tools; complex problems need a pro.
How do I choose a reliable Maytag washer repair technician?
Look for licensed, insured technicians with experience in Maytag models. Request a written estimate, check references, and confirm warranty terms on parts and labor. Prefer technicians who provide transparent diagnostics and on-site demonstrations.
Choose licensed and insured technicians with Maytag experience and clear warranties.
What should I expect during a service visit?
Expect a diagnostic evaluation, an estimated repair plan, and an itemized price. A reputable technician will explain findings, show worn parts, and offer maintenance tips to prevent future issues.
Expect a thorough diagnosis, a clear repair plan, and maintenance tips.
How long does a typical Maytag washer repair take?
Repair times vary by model and fault but most common fixes can be completed in a few hours. More complex issues may require a follow-up visit for parts ordering and installation.
Most common fixes take a few hours; complex issues may need a second visit.
What about safety and warranty after repair?
Ensure the work is performed by a qualified technician with proper safety practices. Verify that parts carry warranty coverage and that the labor warranty is clearly stated in the service agreement.
Safety and warranties are important—make sure the technician provides those details.
Watch Video
Key Takeaways
- Diagnose symptoms and document details before service.
- Know when to DIY and when to call a Maytag washer repair technician.
- Prepare the location and have model information ready for faster service.
- Ask for itemized estimates and genuine parts for lasting repairs.
- Maintain a simple maintenance routine to extend washer life.