Dryer Repair Near Me: A Practical Guide for Homeowners and Renters
Find practical, safety-focused guidance for dryer repair near me. Learn common problems, DIY steps, tool lists, maintenance tips, and when to hire a pro from Home Repair Guide.

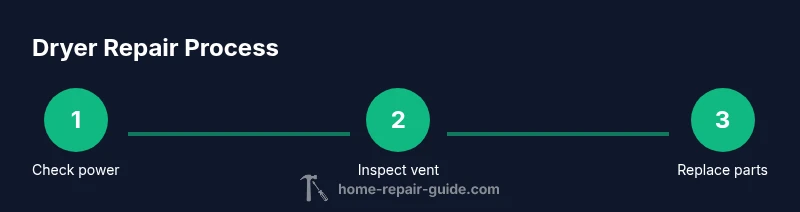
You will learn how to diagnose and address common dryer problems near you, with safety-first guidelines and steps you can perform at home. Gather basic tools, unplug the unit, and follow a structured approach to fix issues like no heat, drum not turning, or prolonged drying times. This quick guide aligns with Home Repair Guide's standards.
Understanding the value of 'dryer repair near me' for homeowners
When a clothes dryer stops working properly, homeowners and renters alike want fast, trustworthy guidance. The phrase dryer repair near me embodies two practical goals: locate a reliable local option and learn how far you can go with a DIY approach before calling in a professional. According to Home Repair Guide, most dryer problems fall into a handful of predictable categories, such as insufficient heat, tumbling failures, and airflow blockages. Knowing the typical failure modes helps you triage the issue, estimate the time and tools needed, and decide whether a DIY fix is feasible or if a trained technician is warranted. In this guide, the Home Repair Guide team emphasizes a safety-first mindset, detailed checklists, and a clear plan of action so you can repair with confidence and minimize downtime. For homeowners and renters, a thoughtful, methodical approach is often the fastest path back to reliable laundry days.
Common dryer problems and quick diagnoses
Dryers present a mix of electrical, mechanical, and airflow issues. Here are the most frequent symptoms and what they usually indicate:
- No heat or very little heat: Could be a blown thermal fuse, faulty heating element, or a tripped breaker. Start by confirming power and checking the lint trap and vent for blockages that force the dryer to run longer and overheat.
- Drum won’t turn: A broken belt, drum roller, or idler pulley often causes the drum to stall. Listen for grinding or squeaking and inspect the belt for cracks or breaks.
- Dryer runs but clothes stay wet: This can mean poor airflow due to clogged venting, a malfunctioning blower wheel, or moisture sensor issues in newer models.
- Noisy operation: Squealing, thumping, or rumbling noises suggest worn drum rollers, rollers, or a loose shock absorber, depending on the model.
- Longer drying times: Reduced airflow from lint buildup, a clogged vent, or a failing moisture sensor can extend cycles and waste energy.
By recognizing these symptoms, you can plan the repair path, source the right parts, and decide whether a pro is needed. Home Repair Guide’s analysis suggests keeping a simple diagnostic checklist handy and documenting symptoms before teardown to avoid unnecessary part replacements.
Safety first: when to DIY and when to call a professional
Electrical and gas appliances pose real safety risks. Always unplug the dryer before inspecting any components, and, for gas models, do not attempt vent adjustments or gas line work unless you’re a licensed technician. If you smell gas, hear hissing, or suspect a gas leak, evacuate and contact your utility or emergency services immediately. Prioritize personal safety over speed: use insulated tools, wear eye protection, and avoid working on live circuits. If you’re unsure about electrical testing (for example, measuring continuity or resistance) or you encounter a damaged power cord, hot surfaces, or a faulty gas valve, it’s wise to call a licensed technician. A pro can validate diagnosis, ensure code compliance, and provide parts that meet warranty and safety standards. The Home Repair Guide team recommends a staged approach: confirm symptoms, verify power and ventilation, and then decide whether a component replacement is within your skill set or if a professional is necessary.
Tools, parts, and sourcing them
A well-curated tool kit makes dryer repairs safer and faster. Essential items include a multimeter, a screwdriver set (Phillips and flat-head), a nut driver or socket set, pliers, and a soft brush or vacuum attachment for lint removal. Optional but helpful additions are a flexible inspection mirror, a replacement belt compatible with your model, thermal fuse or heating element replacements, and manufacturer-approved parts sourced from reputable suppliers. Always verify part compatibility with your model number before purchasing. For safety, avoid using generic substitutes without confirming that they meet the appliance’s electrical and heat requirements. When sourcing parts, consider local appliance parts stores or reputable online retailers, and compare prices and warranty terms. This careful sourcing helps reduce the likelihood of repeated failures and ensures the repair supports long-term reliability.
Diagnostic flow: decide your repair path
A structured diagnostic flow reduces guesswork and helps you decide whether DIY is appropriate:
- Confirm power and vent condition: Ensure the outlet is delivering power and the vent is clear. If there’s no heat, a safety device like a thermal fuse may have tripped or blown.
- Identify the failure mode: Heat, tumbling, airflow, or noise. Each mode points to specific subsystems (thermals, belts, motors, or ducts).
- Check for visible wear: Worn belts, damaged hoses, or clogged lint can indicate where to intervene.
- Assess risk and skill: If wiring, gas lines, or high-voltage components are involved, prioritize professional service.
- Decide on parts change or whole-unit approach: If multiple components show wear, a service call or unit replacement may be more cost-effective in the long run.
This decision tree aligns with Home Repair Guide’s emphasis on safety, cost-effectiveness, and clarity about capability. By documenting symptoms, you’ll have a precise reference when you call a professional.
Maintenance strategies to prevent future problems
Prevention is easier than cure. Regular maintenance can extend your dryer's life and improve efficiency. Start with monthly lint removal and vent cleaning, especially if you dry bulky items or use the dryer multiple times a week. Inspect the door seal and gasket for wear and replace if gaps allow warm air to escape. Periodically check the drive belt’s tension and look for obvious cracks. For gas dryers, keep the vent and combustion area clean and schedule a yearly professional inspection to verify gas connections and flame quality. Consider energy-saving practices like combining smaller loads, avoiding overloads, and using sensor-activated drying settings to minimize unnecessary cycles. A proactive routine reduces wear, lowers energy use, and helps you catch developing problems before they escalate.
Finding reputable repair help near you
When the repair issue goes beyond basic maintenance, locating a dependable nearby technician matters. Start with two steps: compile a short list of local appliance repair shops and check their credentials, licenses, and customer reviews. Ask about diagnostic fees, travel charges, and warranties on parts and labor. Request a written estimate and compare it to the cost of a new unit if your dryer is older or has multiple failing subsystems. Look for technicians who specialize in your dryer brand or model and can provide OEM or manufacturer-approved parts. For a trusted evaluation, you can reference referrals from neighbors or rental-management groups who routinely work with reliable pros. The Home Repair Guide team recommends checking for up-to-date reviews and ensuring a guaranteed parts warranty to avoid repeat visits for the same issue.
Quick-start checklist for homeowners
- [ ] Unplug dryer and disconnect any power promptly before inspection.
- [ ] Check lint trap, vent, and exterior vent cap for blockages.
- [ ] Verify door latch and control panel responsiveness.
- [ ] Test power at the outlet with a multimeter if you’re comfortable.
- [ ] Determine whether symptoms are electrical, mechanical, or airflow related.
- [ ] Source manufacturer-approved replacement parts when needed.
- [ ] Decide whether to DIY or hire a pro based on risk and scope.
Tools & Materials
- Multimeter(Used to test voltage, continuity, and resistance)
- Screwdriver set (Phillips and flat-head)(For removing access panels and fasteners)
- Nut driver or socket set(For belt and support hardware)
- Pliers (needle-nose and standard)(For gripping, pinching, and small parts)
- Vacuum with brush attachment(Lint removal from ducts and cabinet interiors)
- Replacement parts (belt, thermal fuse, heating element)(Only if diagnosed as faulty and compatible with model)
- Soft mallet or non-marring hammer(Gentle taps to seat components without damage)
- Flashlight or headlamp(Illuminates tight spaces inside the cabinet)
Steps
Estimated time: 90-150 minutes
- 1
Power down and prep the workspace
Unplug the dryer, pull the unit away from the wall, and lay down a cloth to catch dust. Remove items from the drum and open the access panels. This reduces shock risk and keeps components organized for testing.
Tip: Take photos of wiring before removing any connections to aid reassembly. - 2
Verify power and outlet health
Use a multimeter to confirm the outlet is delivering voltage (and that the dryer cord is intact). If power is inconsistent, address the circuit breaker or GFCI as a possible cause before moving forward.
Tip: If you’re not comfortable testing live circuits, skip to the safety-check and call a pro. - 3
Check airflow path and lint buildup
Inspect the lint trap, blower housing, and vent duct for clogs. A blocked vent is a common cause of overheating and poor drying performance. Remove lint with a brush or vacuum and reseal joints.
Tip: Even small lint obstructions at the vent exit can disrupt airflow dramatically. - 4
Inspect the belt and drum engagement
If the drum doesn’t turn, inspect the belt for cracks or fraying and check the idler pulley and rollers for wear. Replace worn parts with manufacturer-approved equivalents.
Tip: When removing parts, mark their orientation to speed proper reassembly. - 5
Test thermal components and heating circuit
For no-heat symptoms, test the thermal fuse and heating element with the multimeter. If a fuse is open or a heater coil is broken, replace only with correct part numbers. Reassemble and test.
Tip: Thermal components can fail intermittently—don’t assume a single failure is the only cause. - 6
Reassemble and run a short dry cycle
Reattach panels, reconnect power, and run a short cycle with a light load. Observe heat, drum motion, and airflow. Stop if you notice unusual smells, smoke, or abnormal warmth.
Tip: Keep a fire extinguisher nearby during first post-repair tests and never leave a running dryer unattended.
FAQ
What are the most common reasons a dryer won’t heat?
The most common causes are a blown thermal fuse, a faulty heating element, or a tripped breaker. Start by confirming power and checking for vent blockages that may cause overheating and shut the heater off as a safety precaution.
Common causes include a blown thermal fuse, a failed heating element, or a tripped breaker. Check power and vent blockages to rule out safety shutoffs.
Can I replace a dryer belt myself?
Yes, belt replacement is a common DIY repair for tumbling issues. Ensure you have the correct belt model and follow the device’s service manual or OEM guidance to avoid misalignment.
Yes, you can replace a dryer belt if you have the right belt model and follow the manual. Take care with reassembly.
How long does a typical dryer repair take?
Most basic repairs take 1–3 hours, depending on access to components and your familiarity with the appliance. More complex fixes may require a longer commitment or a pro visit.
Most repairs take a couple of hours. More complex issues may need a pro.
Is a gas dryer repair different from an electric one?
Gas dryer repairs involve safe handling of gas lines and combustion components, which typically require a licensed technician. Electric dryers mainly focus on electrical and heating elements, which can be DIY if you’re comfortable testing circuits.
Gas dryers need a licensed tech due to gas lines; electric dryers are more DIY-friendly if you’re careful with circuits.
What is the typical cost range for dryer repair?
Costs vary by model and part availability. Budget for parts and labor, but check for warranty implications and whether replacing the unit would be more cost-effective in some cases.
Costs vary by model and parts; consider warranties and whether replacement might be more economical.
When should I replace my dryer instead of repairing it?
If the repair exceeds a significant portion of the appliance’s value or if multiple major failures recur within a short period, replacement may be more cost-effective. Consider energy efficiency and anticipated remaining life.
If repairs cost a lot or fail often, replacement might be wiser, especially for energy efficiency.
Watch Video
Key Takeaways
- Identify root cause by symptom category (heat, drum, airflow, noise).
- Prioritize safety—unplug, ventilate, and protect yourself from shocks.
- Have the right parts and tools ready before starting.
- When in doubt, call a pro to prevent further damage.